Scan-to-Email on a Xerox Copier
Instructions and tips on using a Xerox copier to scan to email.
- On a Xerox C70 copier, the control panel home screen looks like this:
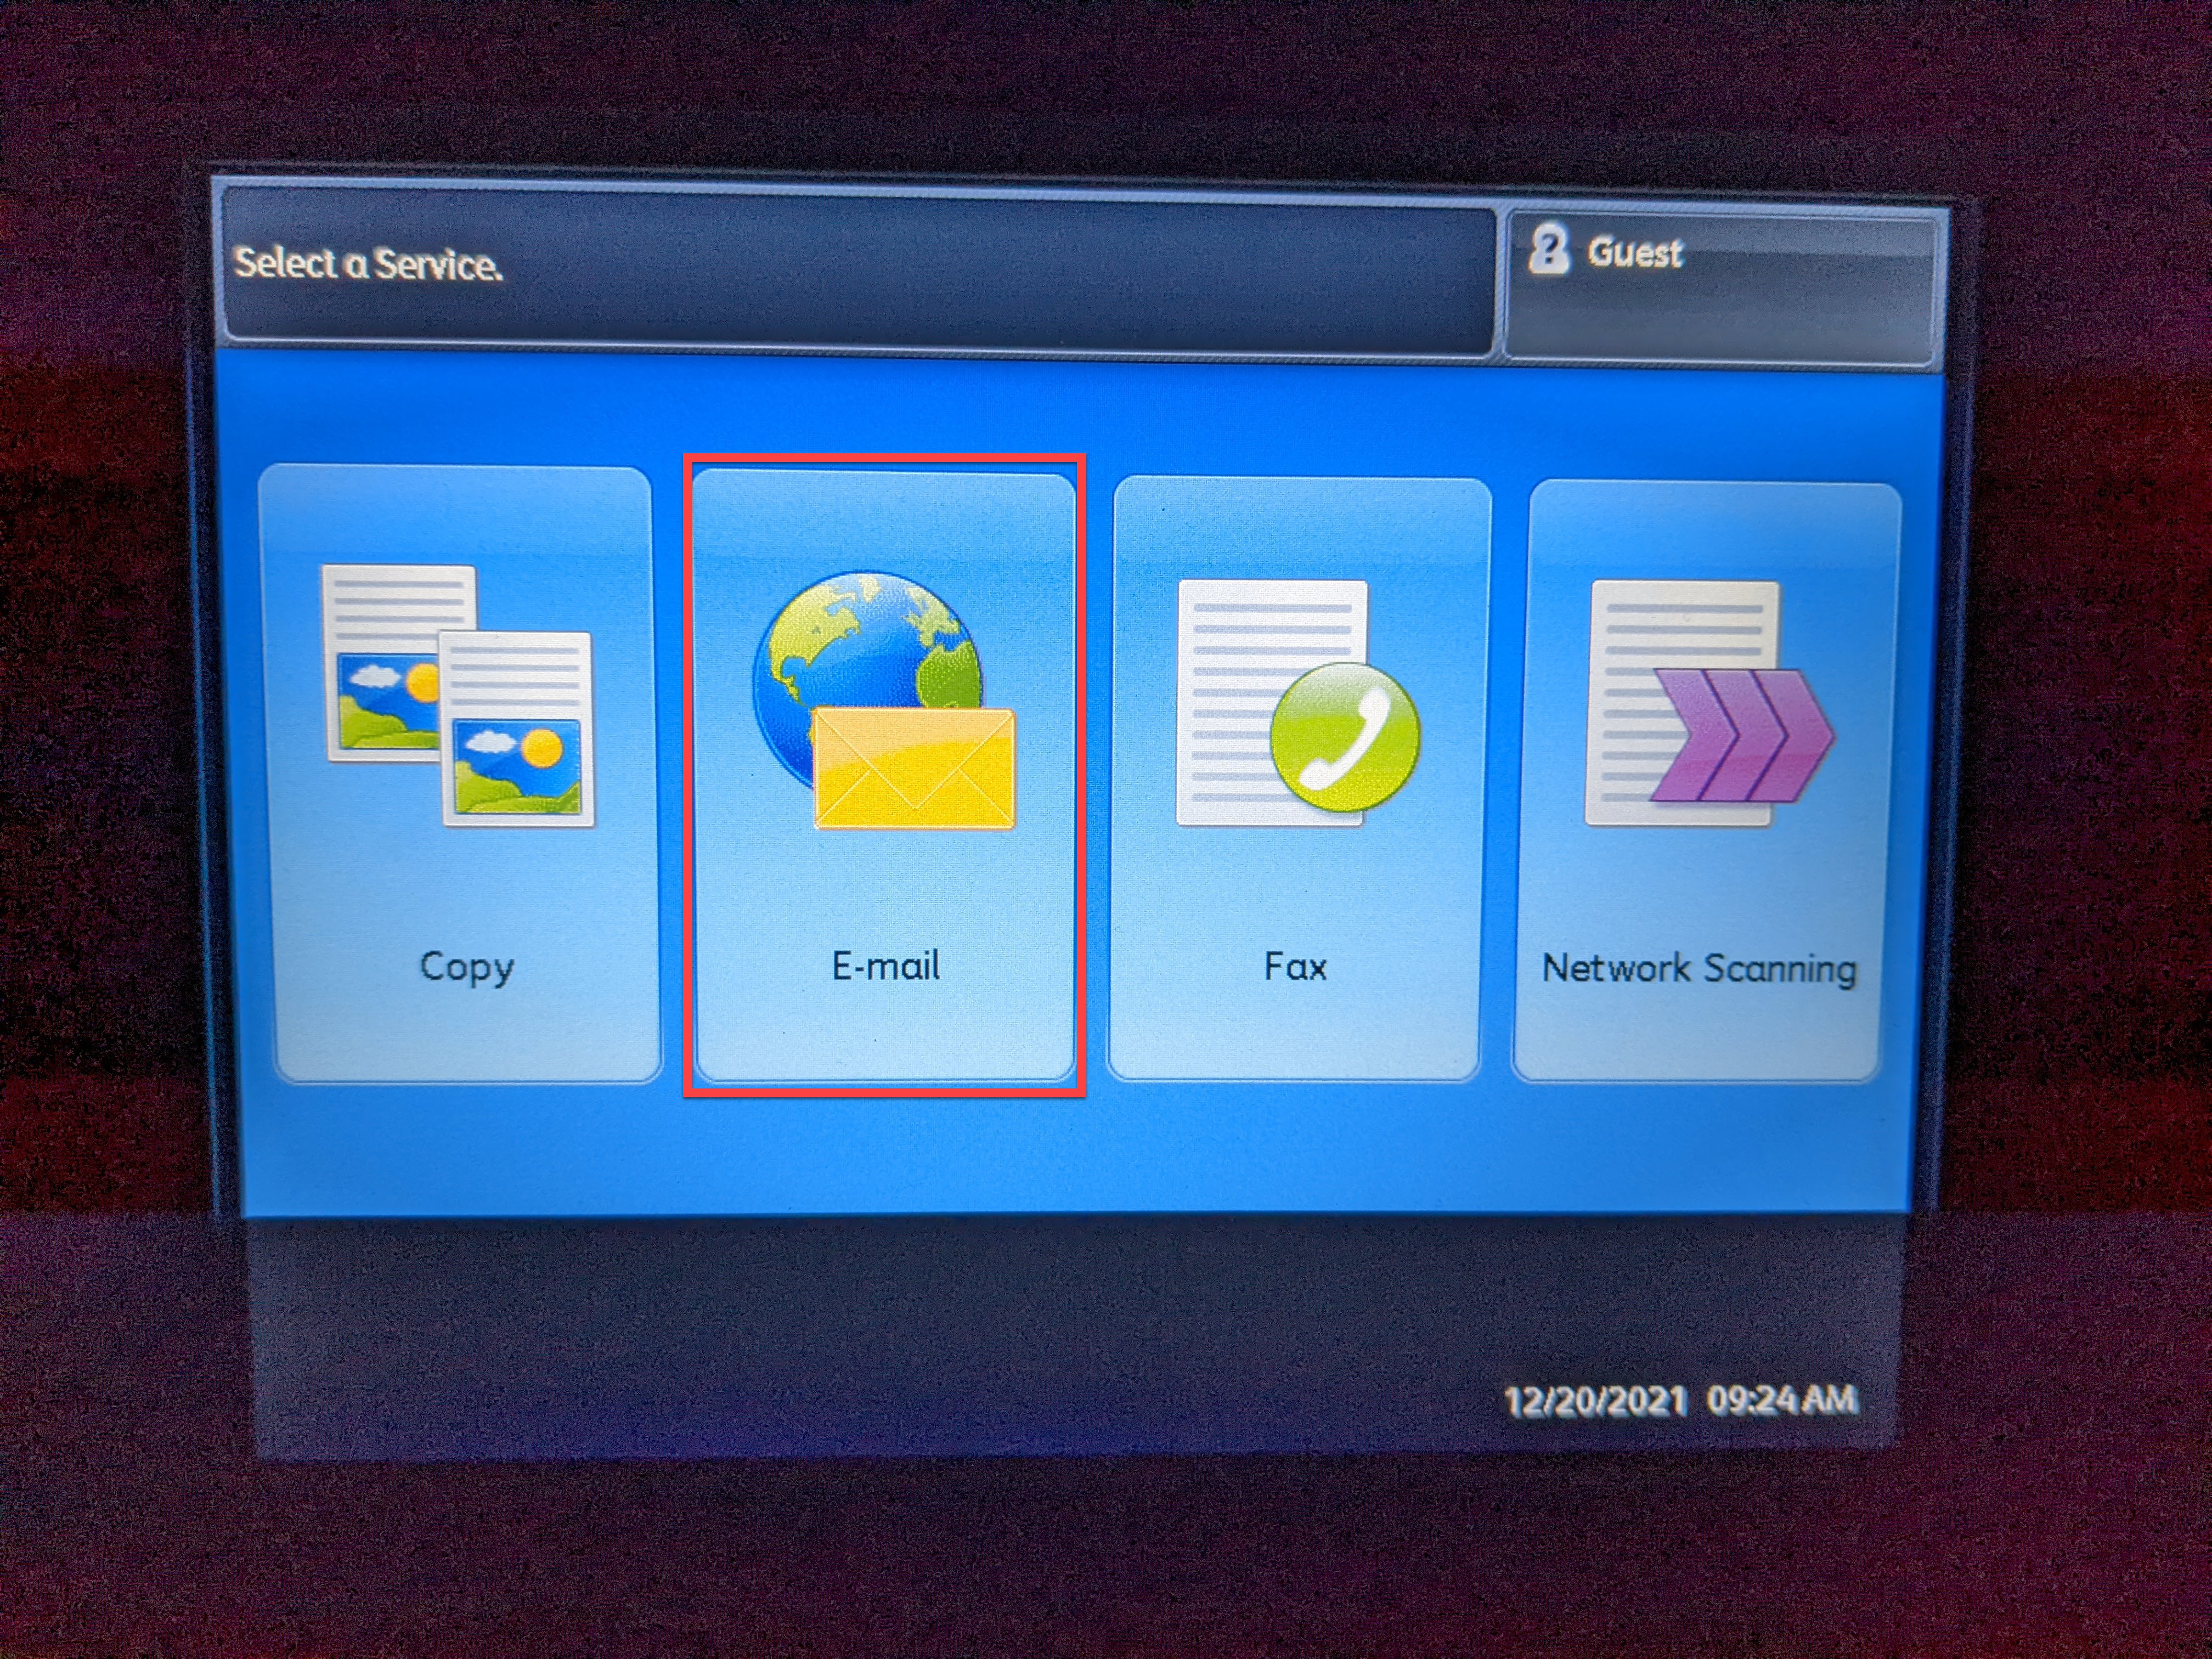
- Select the "E-mail" option to scan to your District email account:
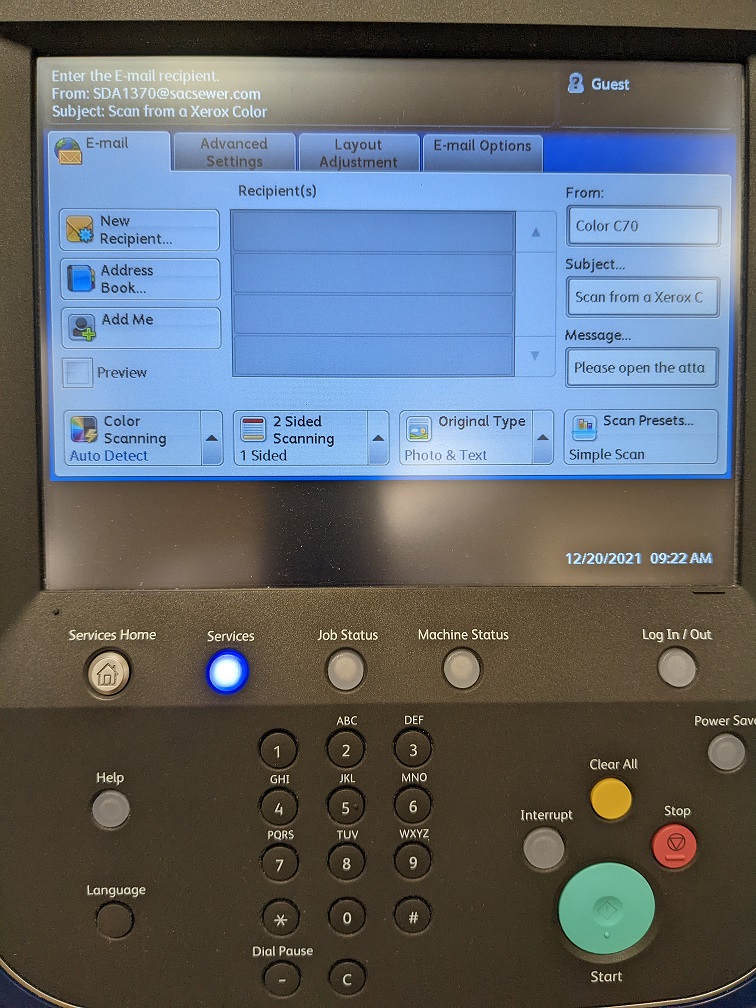
- There are two ways to add your email address to the scan options. The first method is to use the Address Book. Select the "Address Book" option from the screen. This will take you to the following screen:
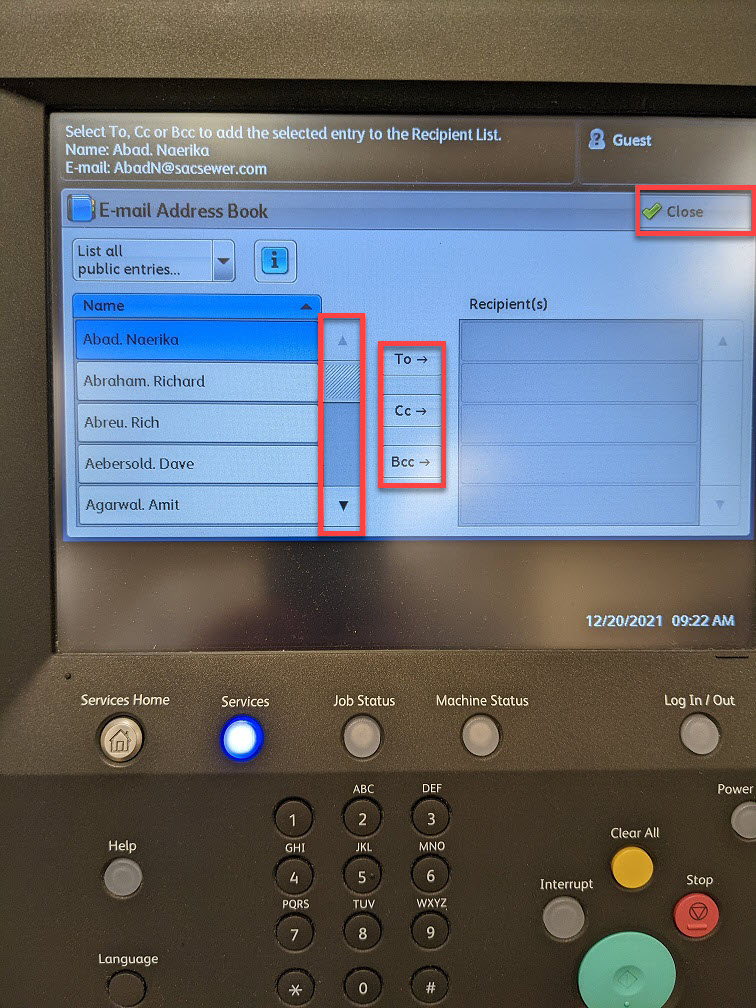
- As shown above, use the scroll bar to slide through the directory of names until you find your own name. With your name highlighted, select the "To" option to add your name to the Recipient list. You may do this for any number of recipients you wish to receive the scan. When done, select "Close" in the upper right corner. You will then see your name populated as shown below:
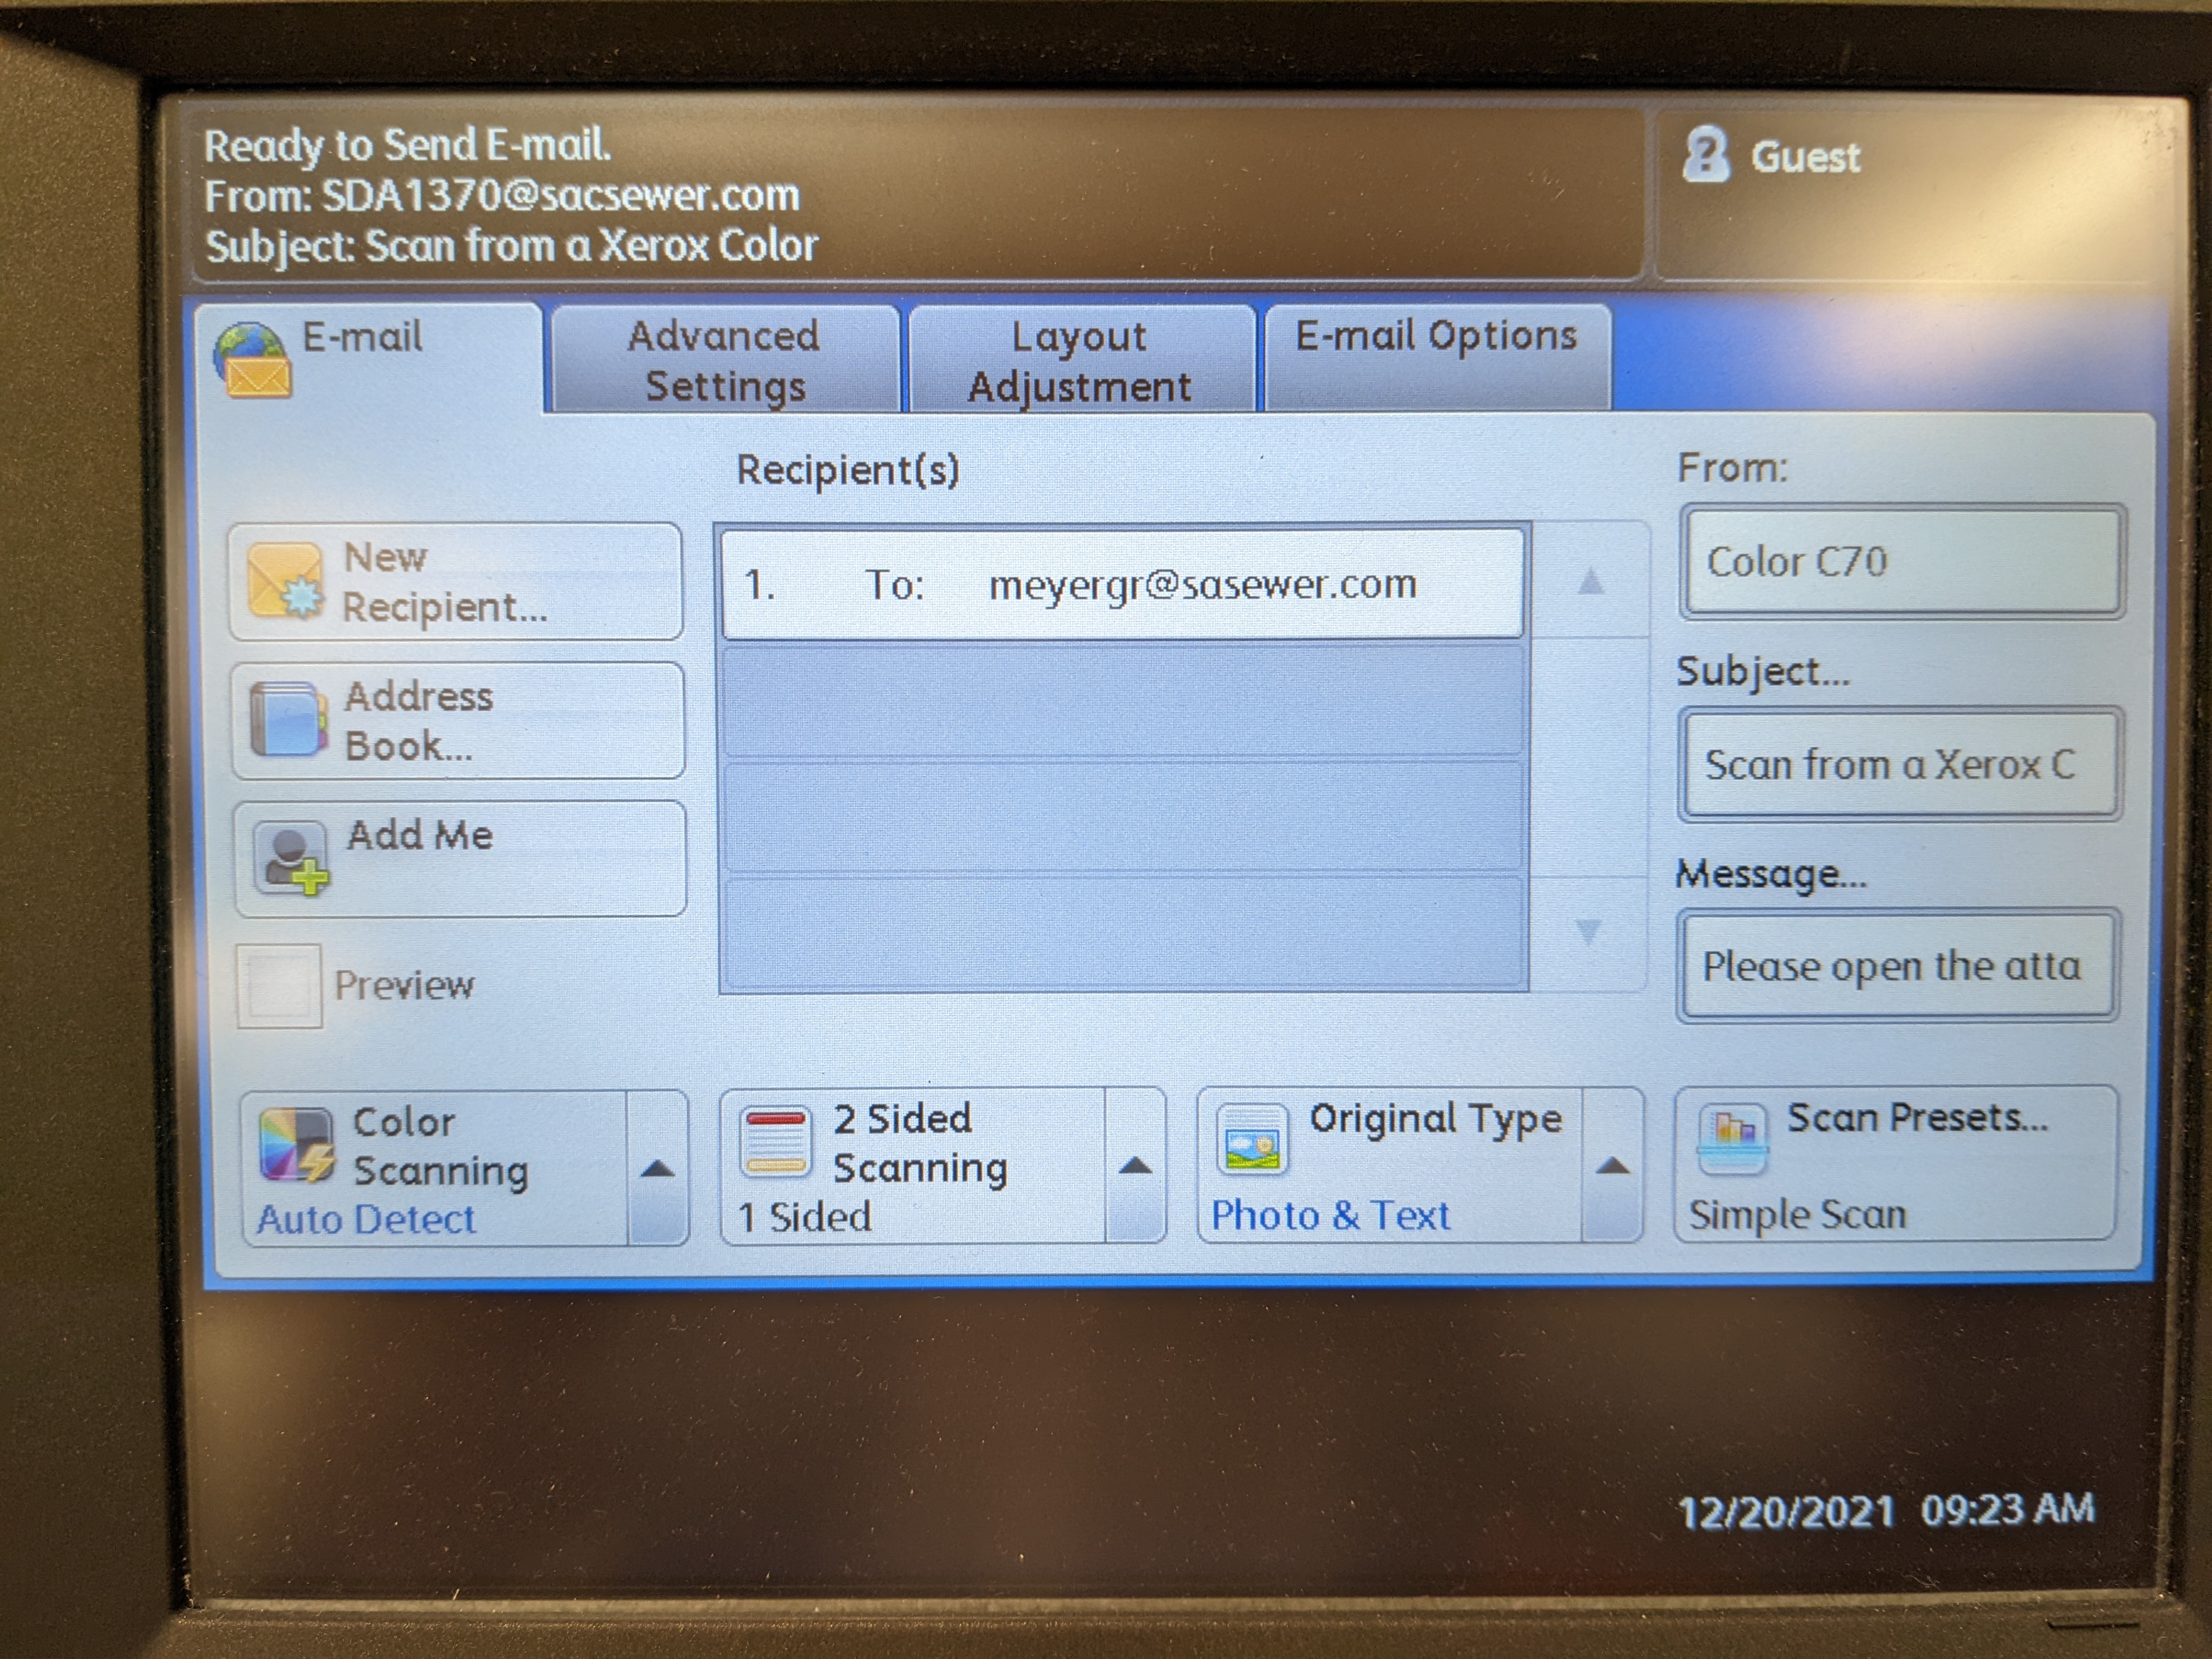
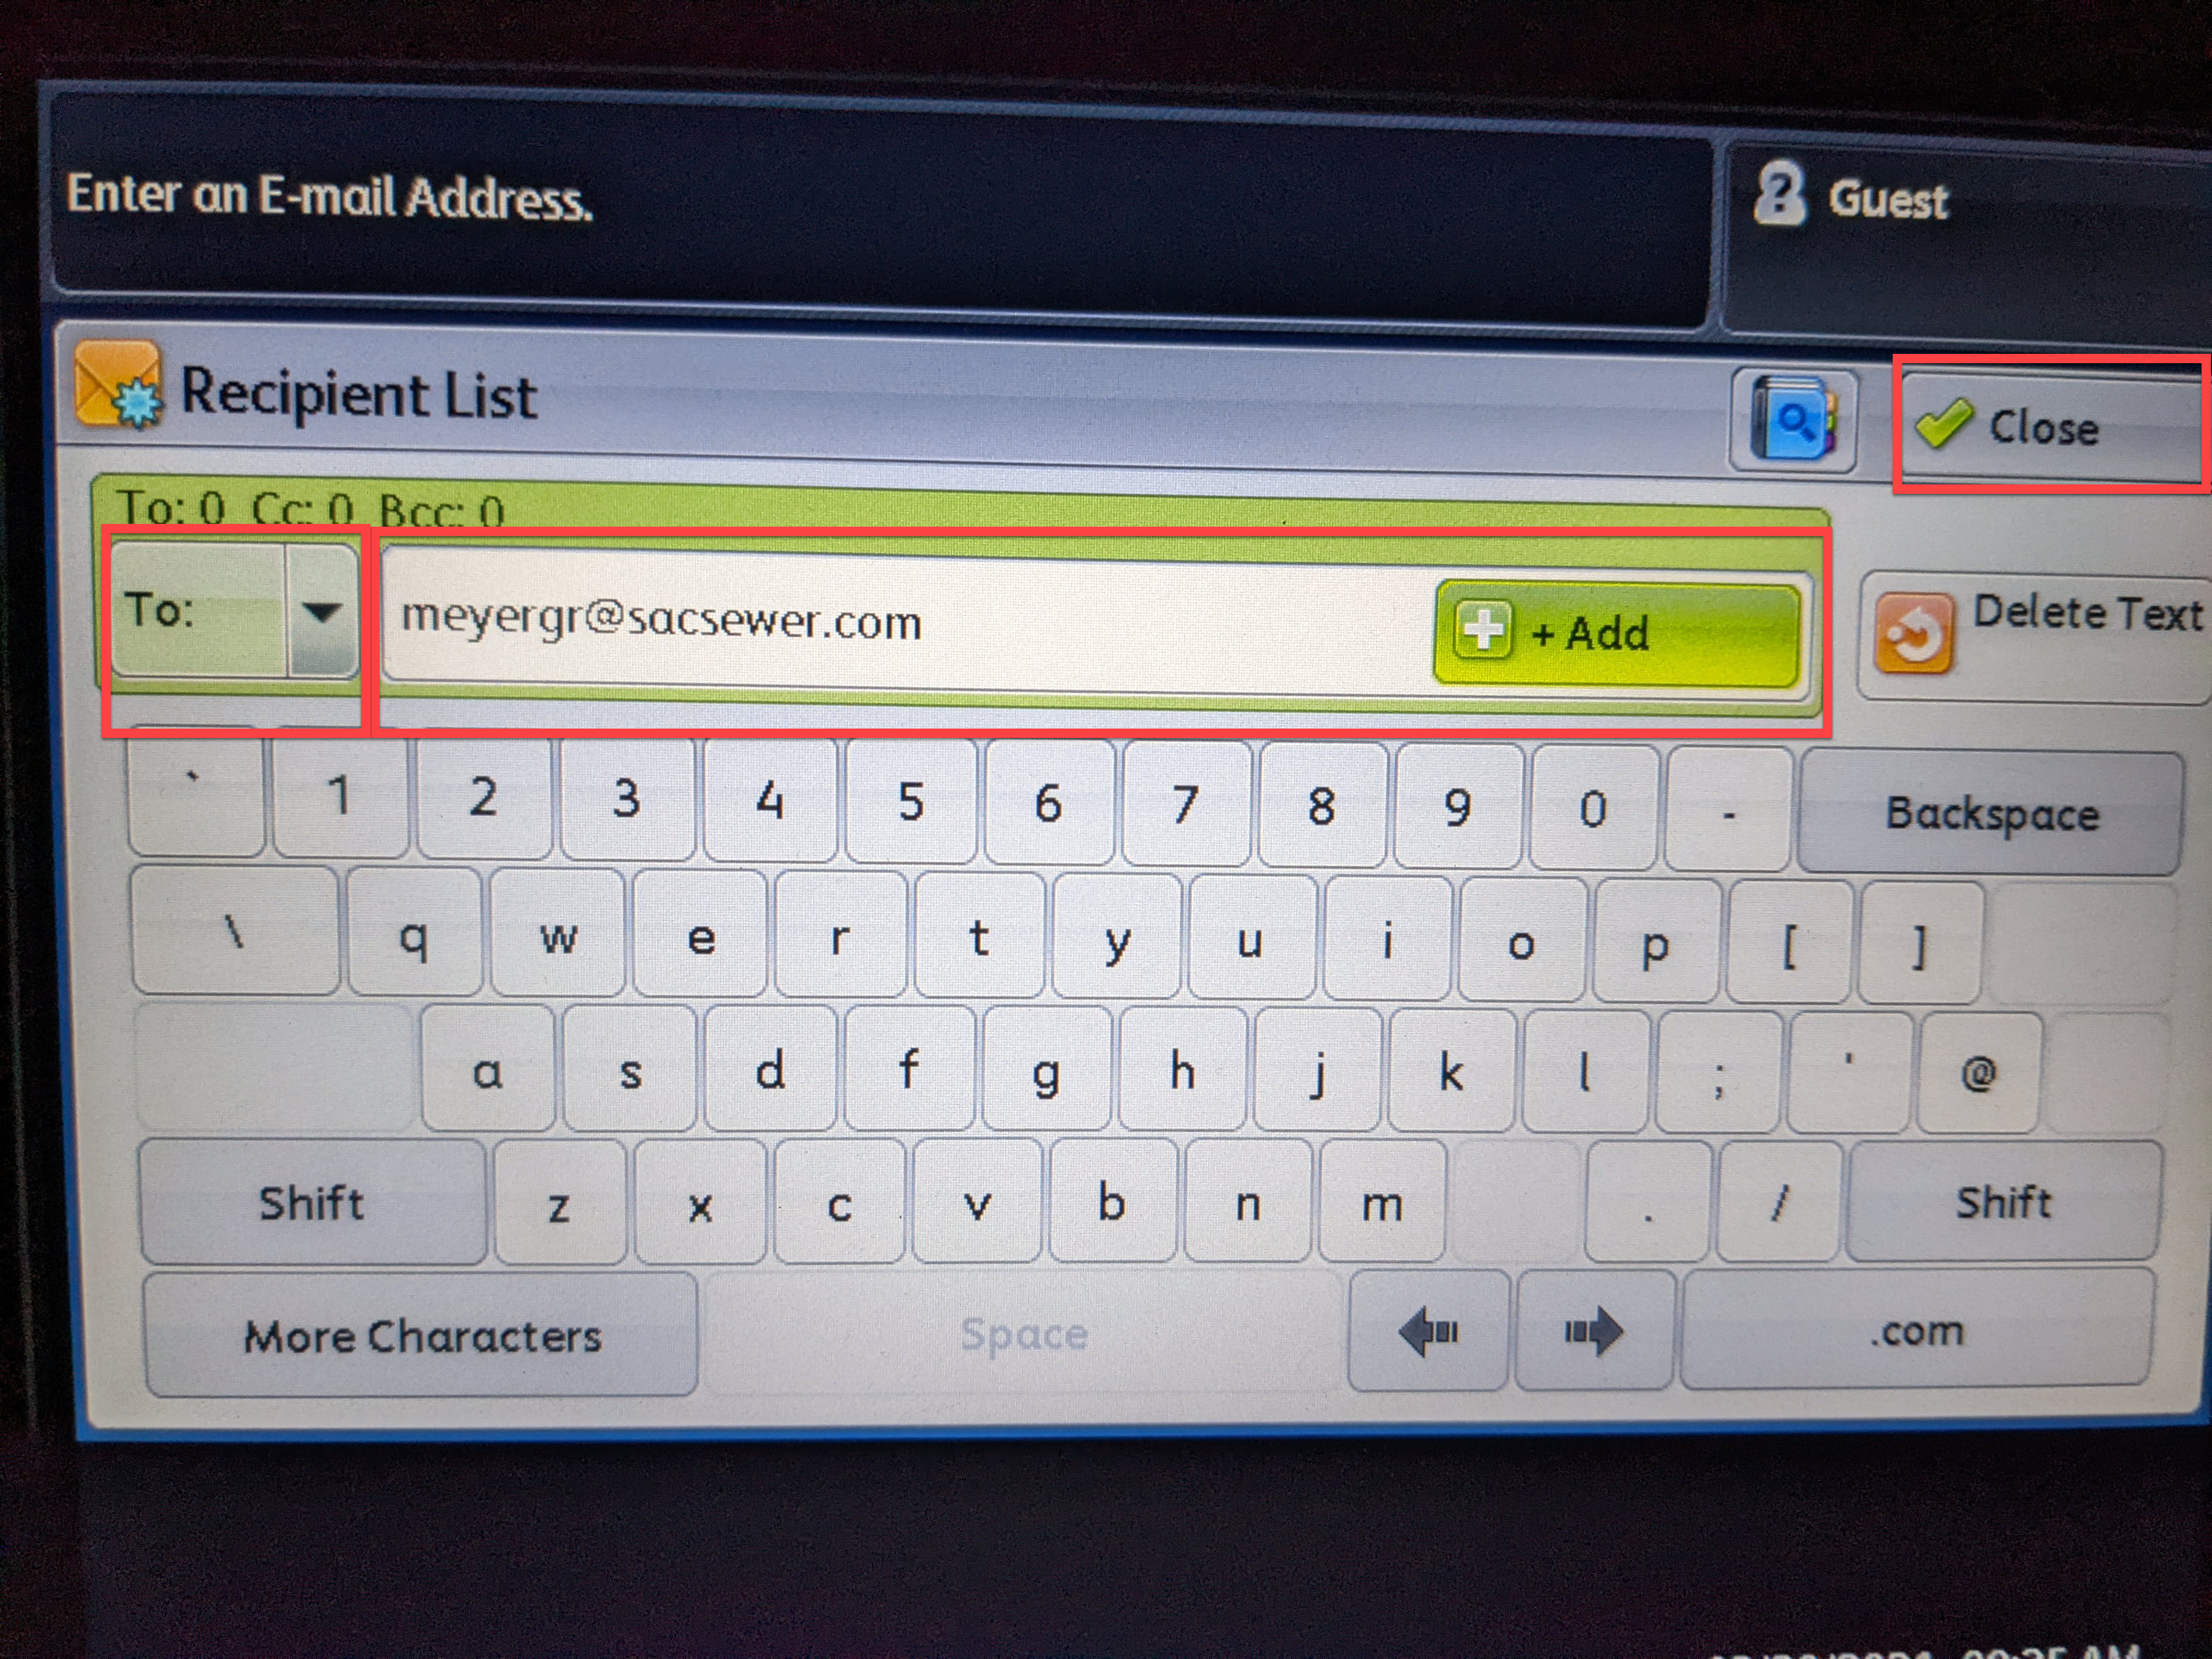
- The alternate method is to add your email address manually. This may be necessary if your email address is somehow missing from the Address Book of the copier. Instead of selecting "Address Book", select "New Recipient". Type in your email address, as shown below, and select "Add", then "Close". Again, you may do this for any number of recipients. Select the dropdown arrow next to "To:", to select from different sending options, such as "Cc", and "Bcc".
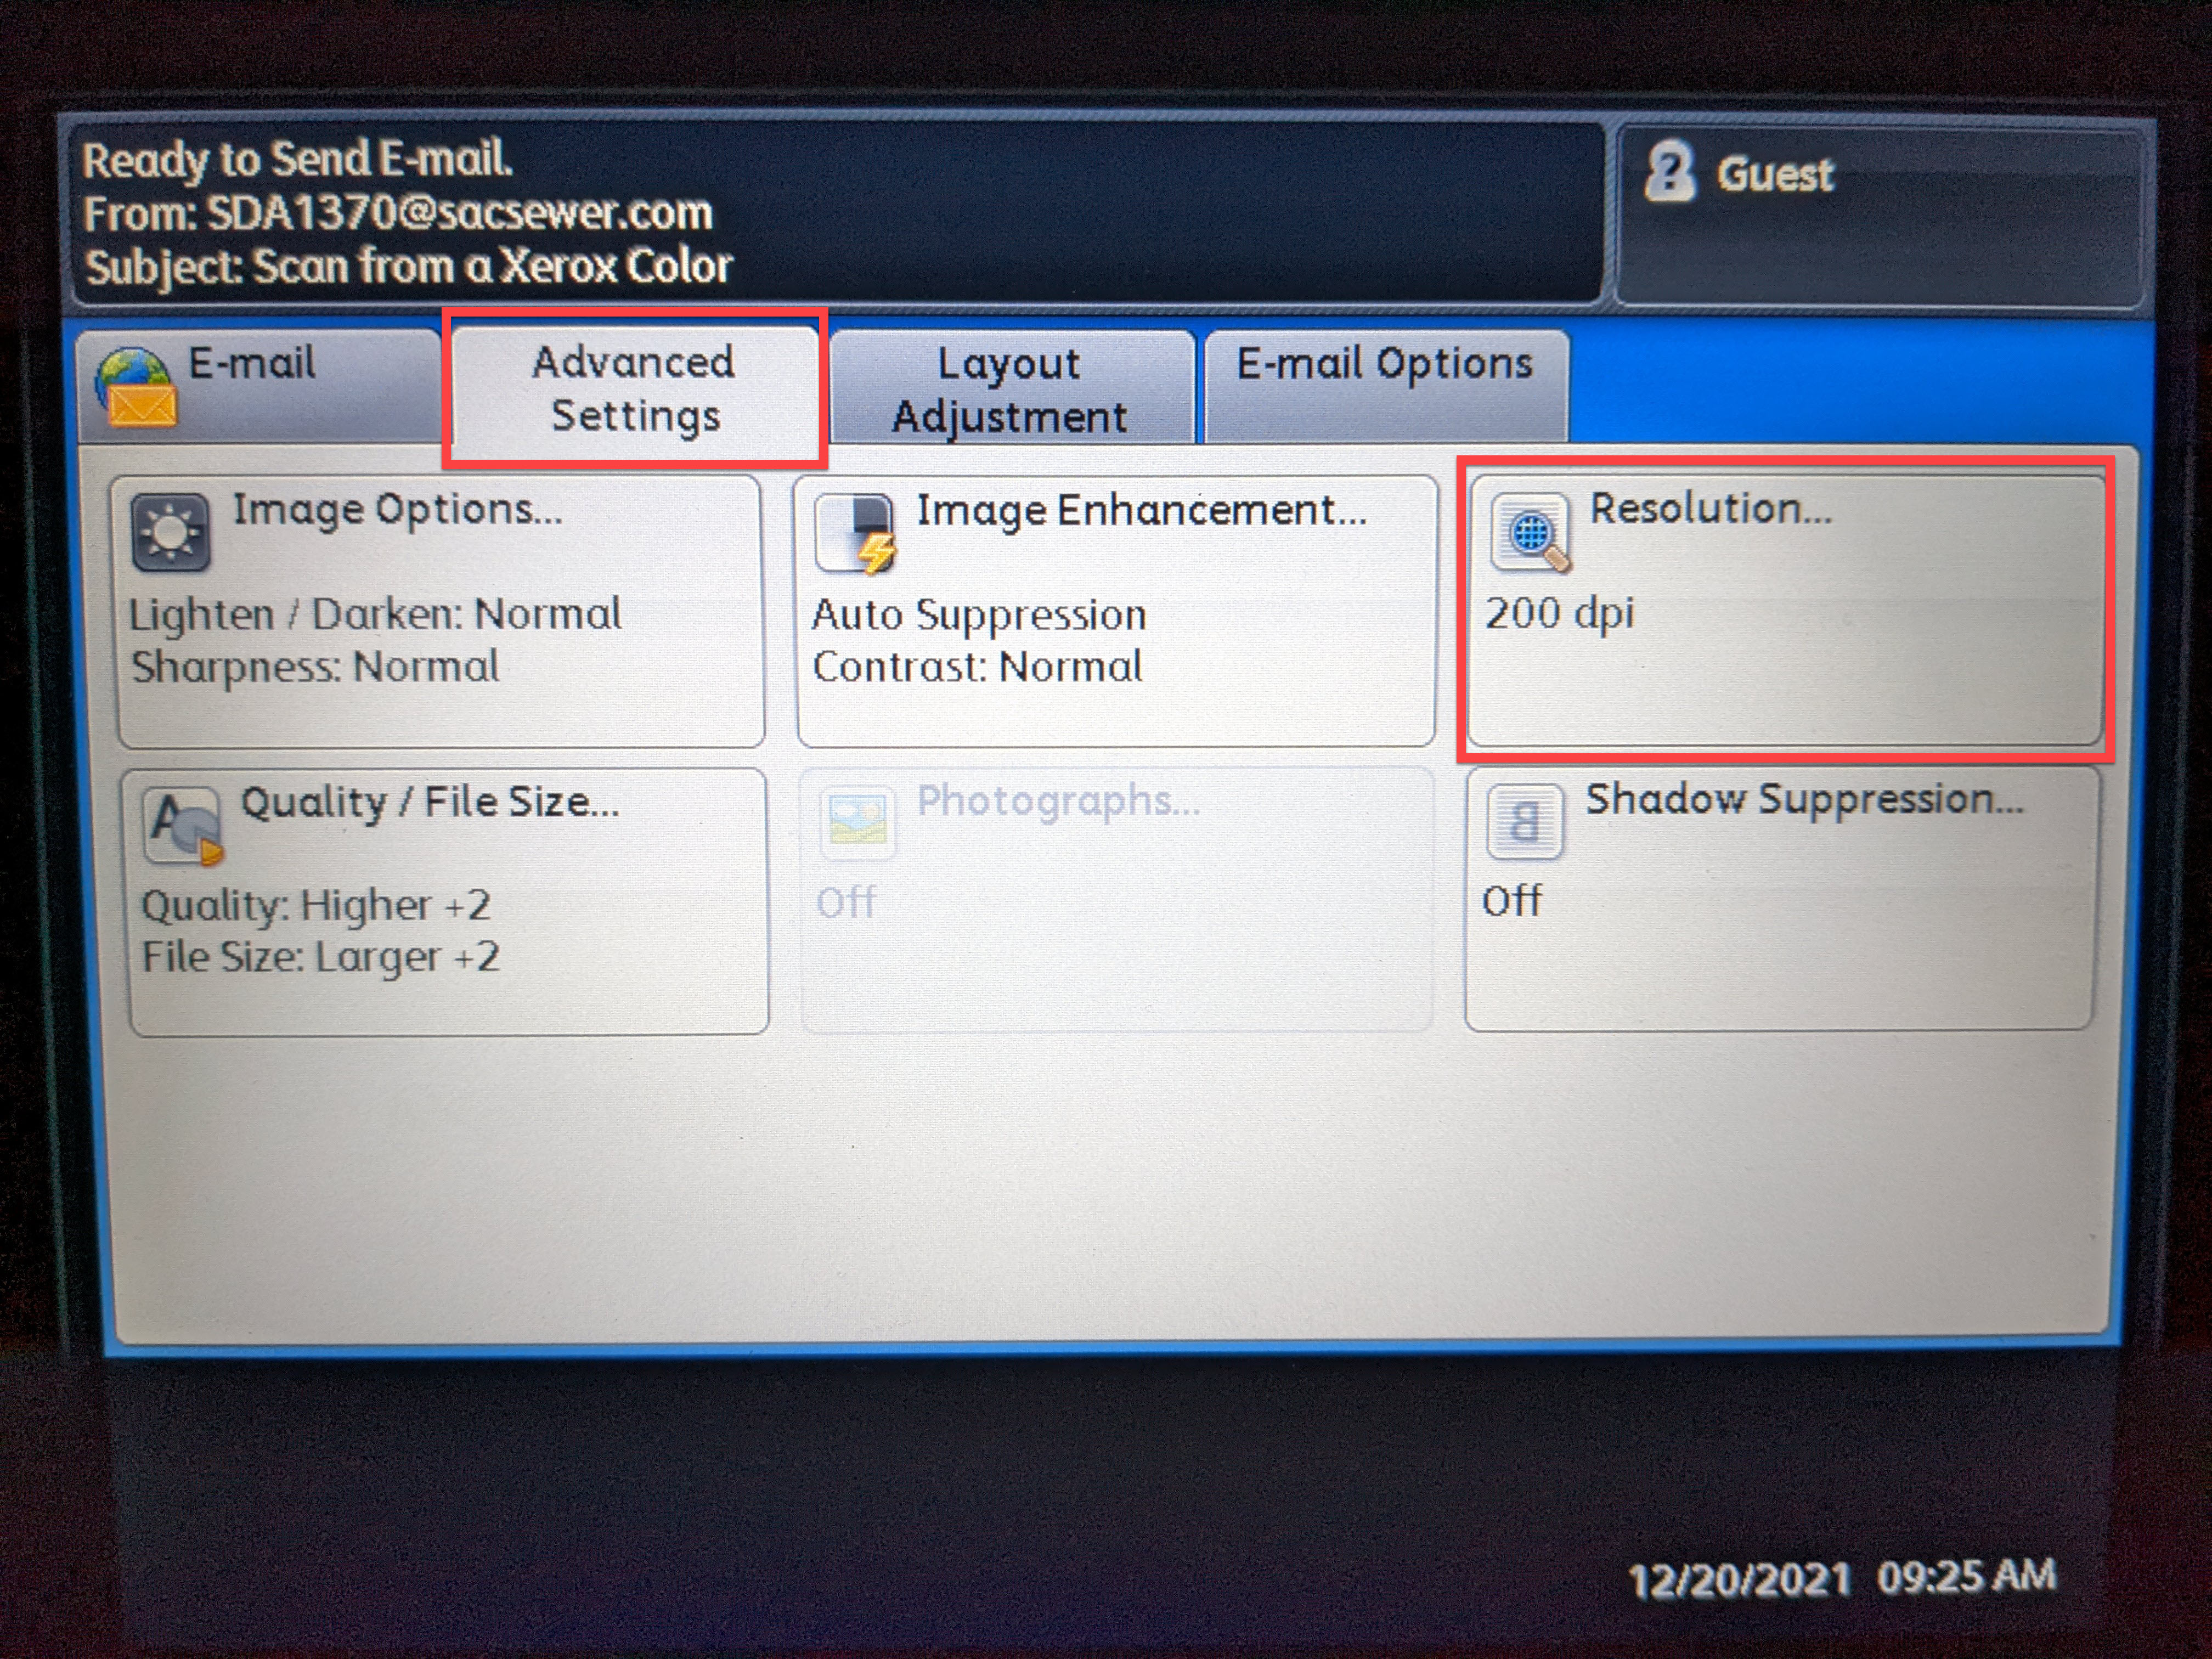
- Now that you have the recipient(s) selected, there are several options to consider. If your document is small, and you want the sharpest image possible, you may select a higher resolution for your scan. In most instances, the default resolution of 200 DPI is sufficient. However, it is a selectable option. One word of caution: a lengthy document scanned at a higher resolution setting, such as 600 DPI, will greatly increase the processing time of the document. It is possible for the interface to time out before the copier has completed the processing of the scan. In this case, it will fail to send the scan to your email. Use this setting with caution. From the Email screen, select "Advanced Settings."
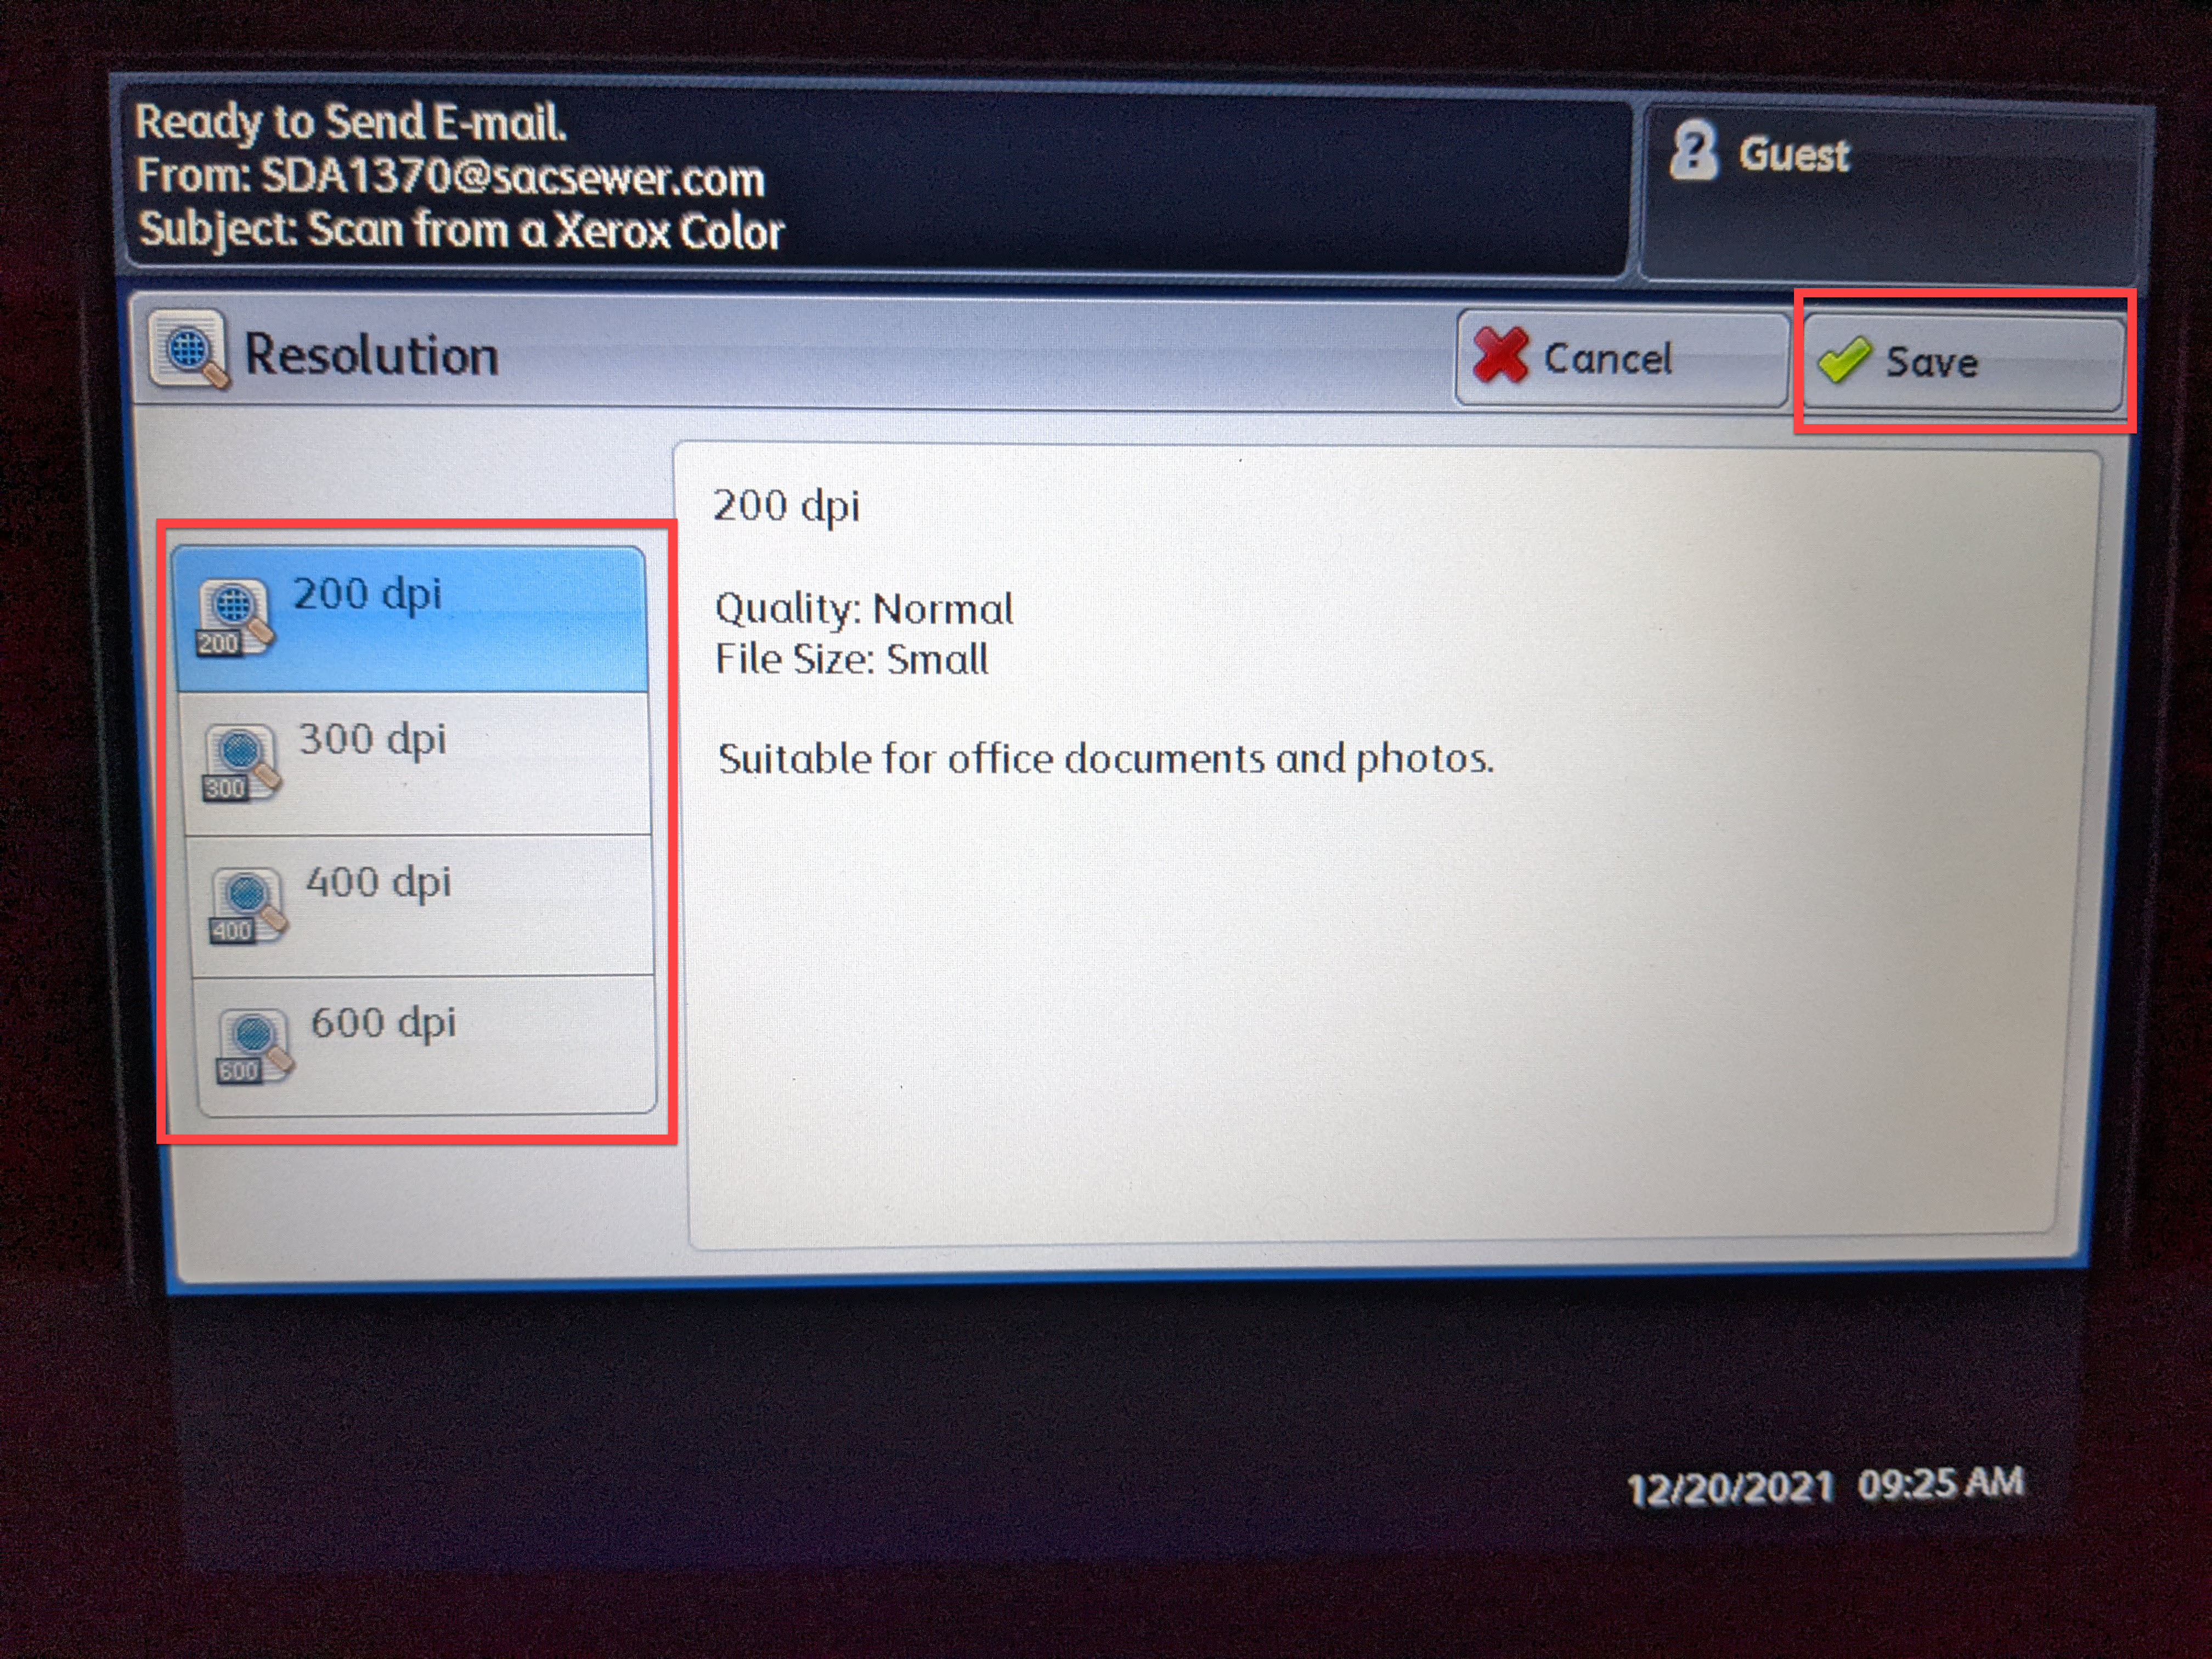
- Select "Resolution", then choose the desired setting. Click "Save" to continue.
- The next option to consider is whether the document is portrait, or landscape. The default setting is portrait. If you need to change it, do the following. From the Email screen, select "Layout Adjustment":
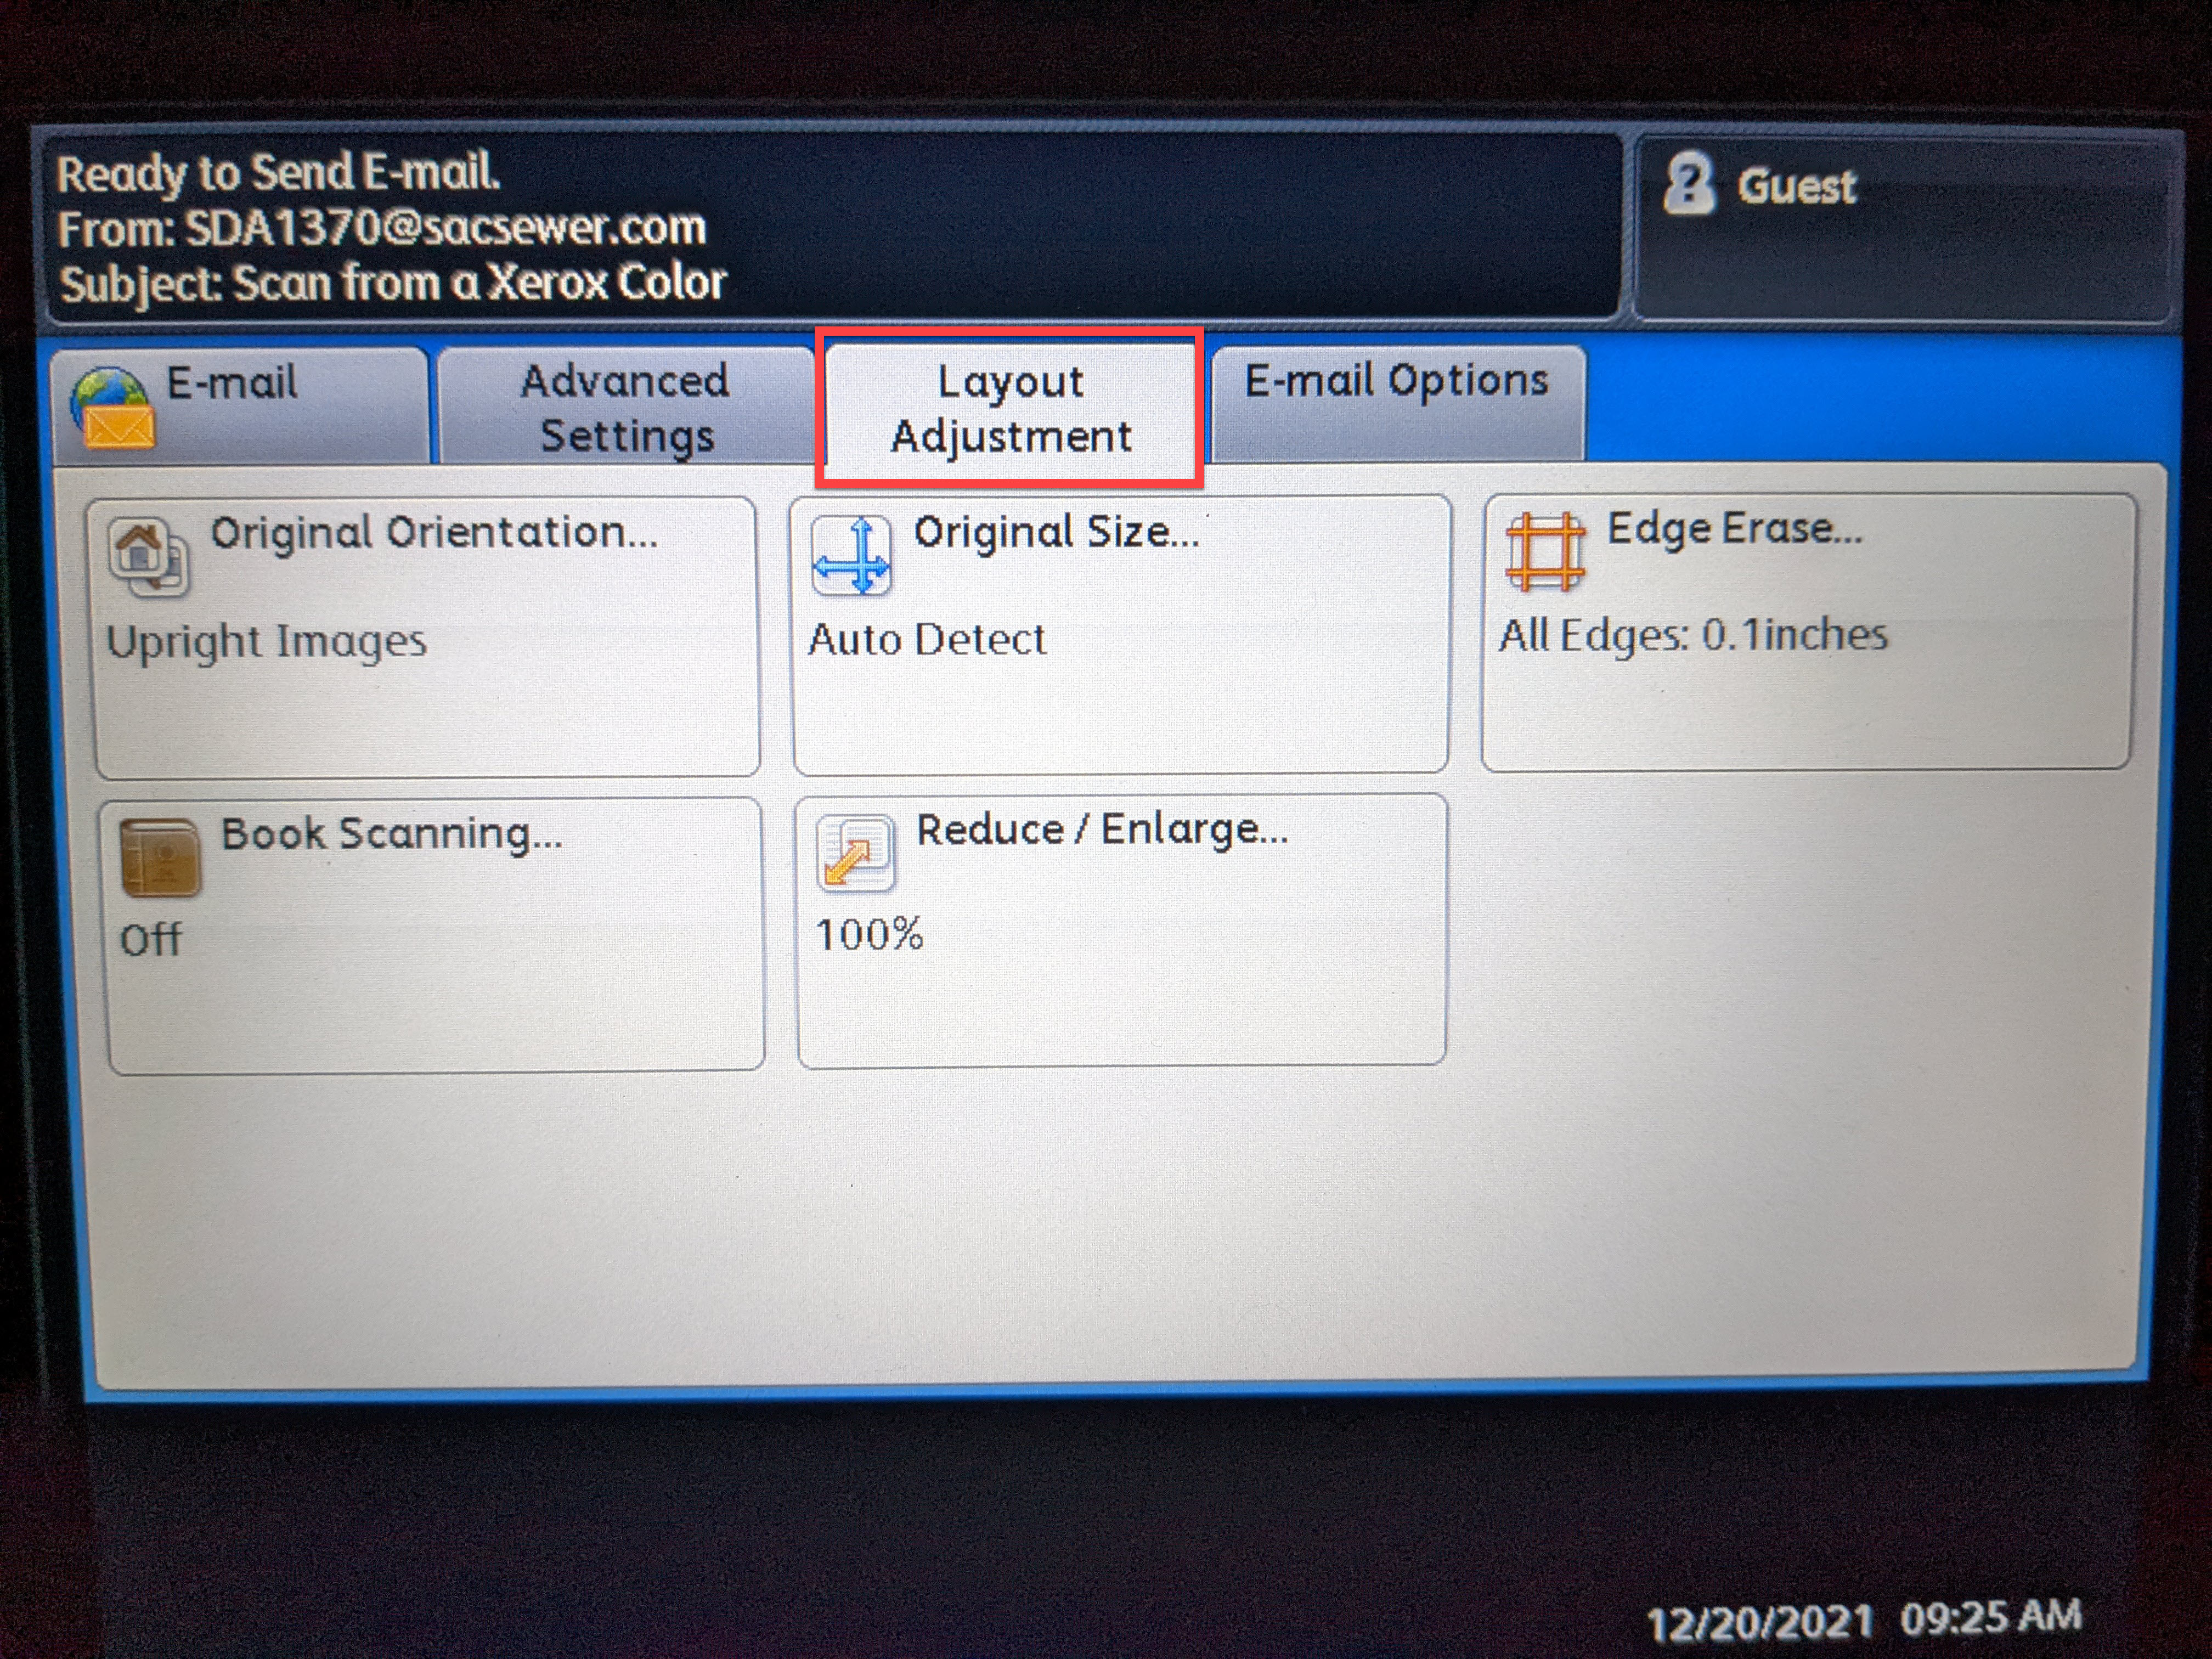
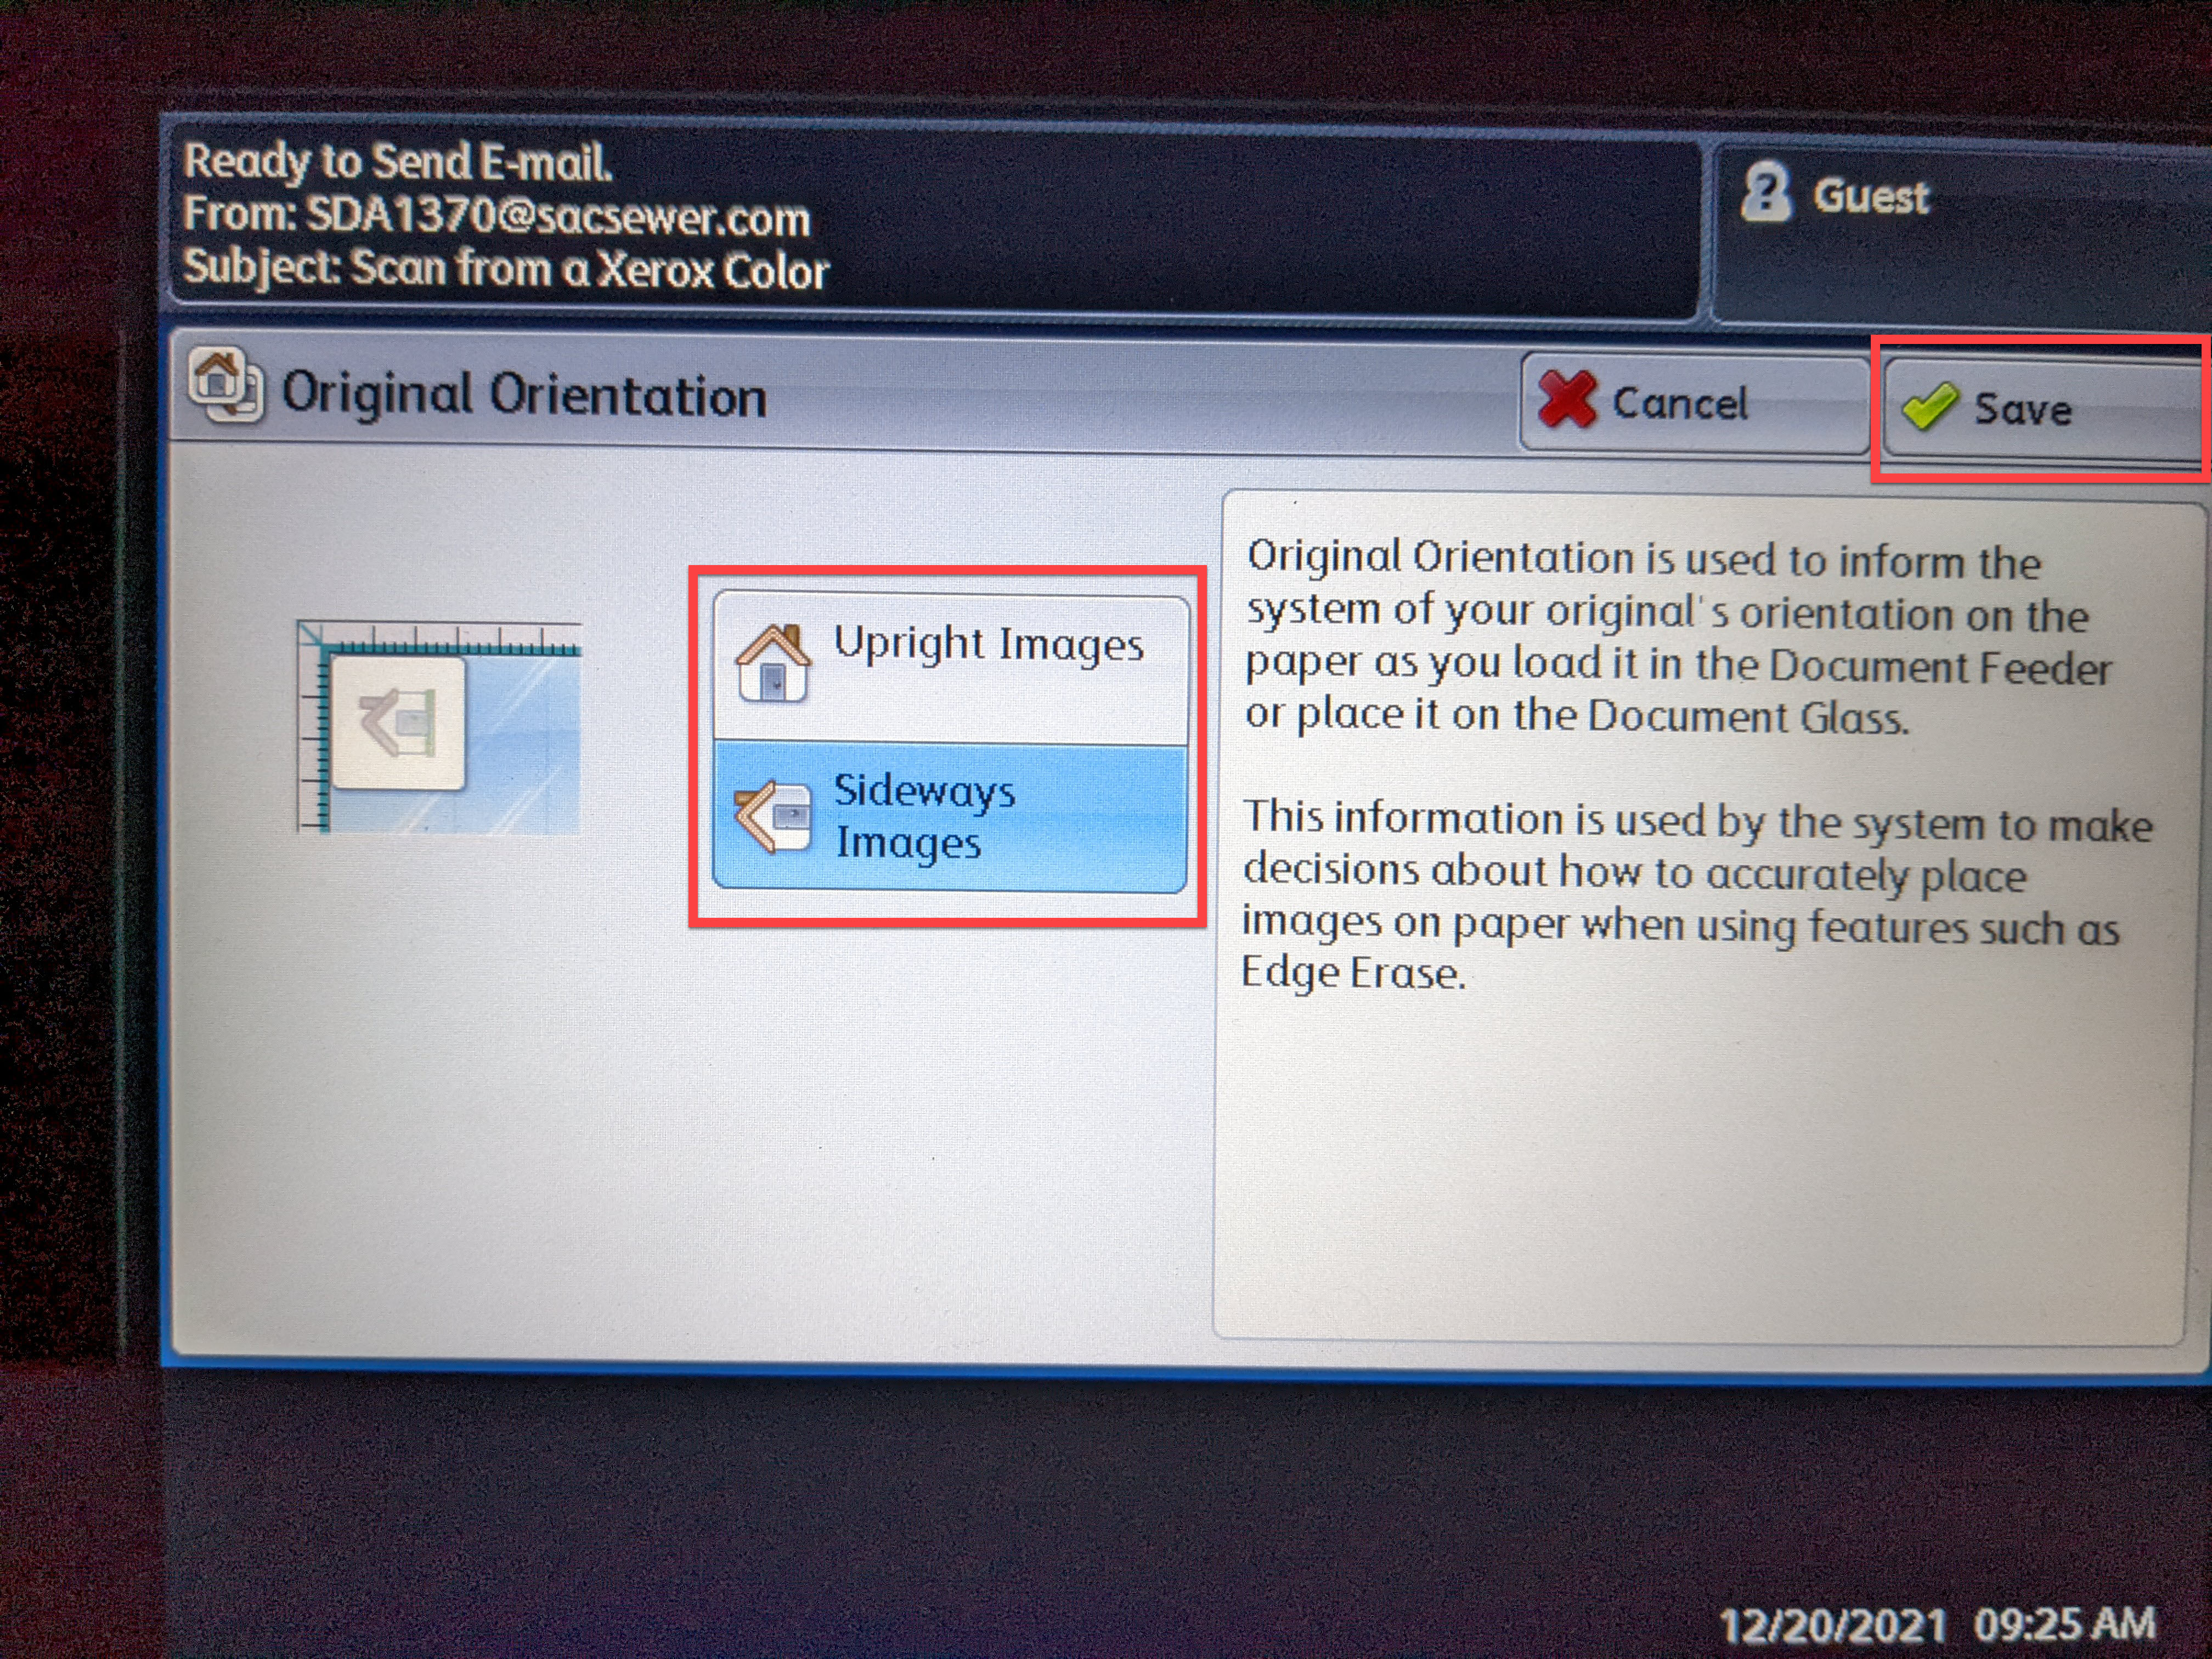
- Select "Original Orientation". For the landscape option, select "Sideways Images". Then, click "Save."
- Finally, to scan the document and send it on its way, press the green "Start" button on the control panel.
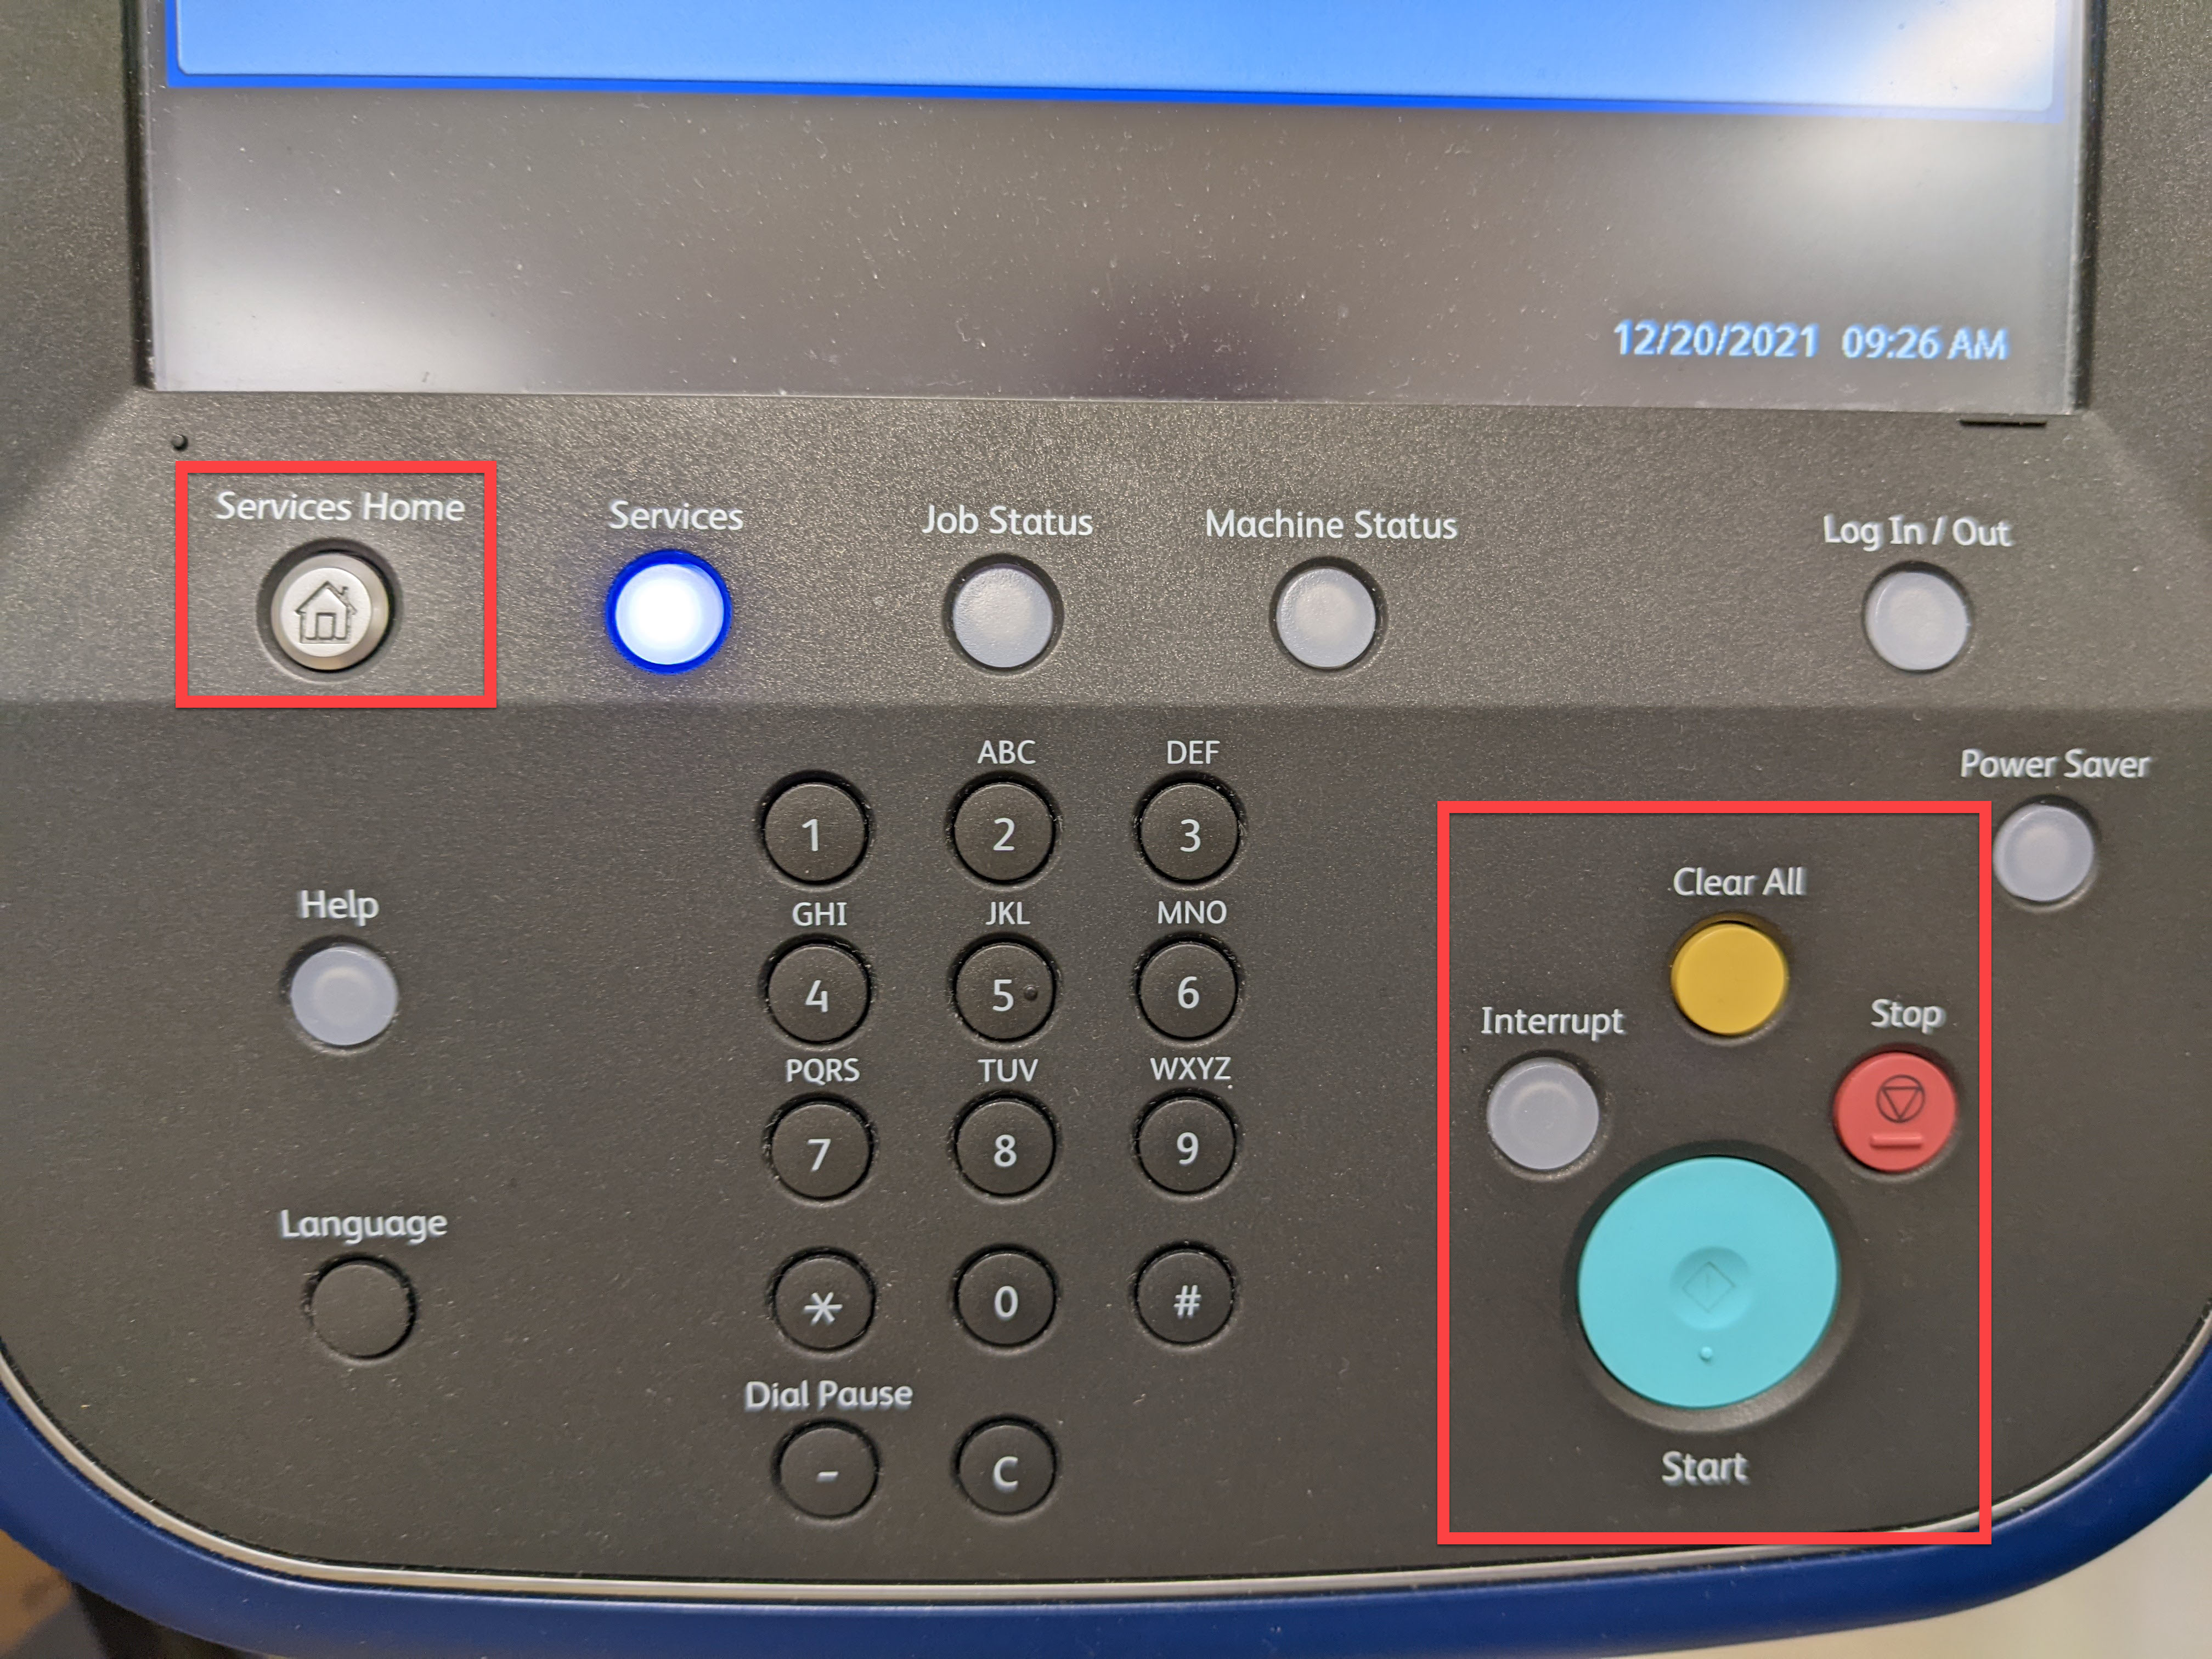
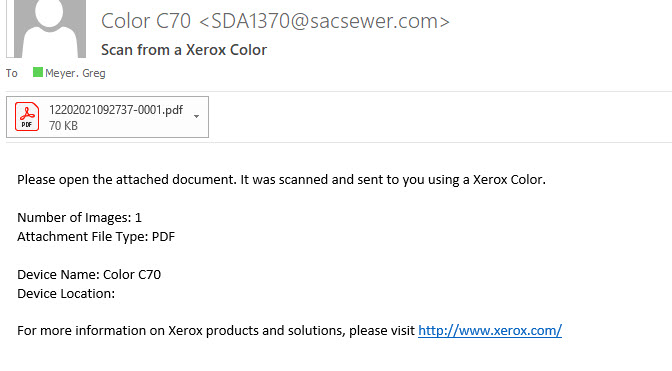
- When the scan is complete, the copier will beep. At this point, you may select the "Services Home" button to clear the interface, or you may walk away and it will time out in a minute, or so. In your email, you should receive a message similar to the following:
