Create a view of a list or library
You can create custom views of libraries and lists to organize and show items that are most important to you (like certain columns), to add filtering or sorting, or to have a more engaging style. You can create a personal view (that only you can see) or, if you have permissions to do so, you can create a public view for everyone who uses the list to see.
Step-by-step guide
To create a view:
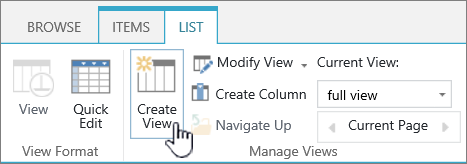
Go to the list or library where you want to create a view, click the List or Library tab, and then click Create View.
Note: If Create View is disabled, you don’t have the permissions to create a view.

On the Settings page, choose a view type.
In the View Name box, type the name for your view. Select Make this the default view if you want to make this the default view for the list or library. Only a public view can be the default view for a list or library.

In the Audience section, under View Audience, select Create a Personal view or Create a Public view. Create a personal view when you want a view just for yourself. Create a public view when you want everyone who uses the list to see it.
Note: If Create a Public View is disabled, you don’t have the permissions to create a public view for this list or library.
In the Columns section, select the columns that you want in the view and clear the columns that you don’t want to appear. Next to the column numbers, select the order that you want to columns to appear in the view.
Configure the other settings for your view, such as Sort and Filter, and click OK at the bottom of the page.
