How to create unique permissions
Before creating unique permissions:
- Understand permission levels by reading this: https://docs.microsoft.com/en-us/sharepoint/understanding-permission-levels
- Create an ITSD ticket at https://help.sacsewer.com to make sure unique permissions are right for you.
To create unique permissions, follow these steps:
- Create a new library
- Create a new SP group
- Customize permissions for the library
- Create folders (if needed for more granular permissions)
Step-by-step guide to Create a New Library
A new library needs to be created for the files that need unique permissions. This will help with managing permissions since they are at the library level.
Things to know before creating a new library:
- SharePoint URLs are limited to 256 characters. When creating a library, the name is part of the URL and the 256 character limitation. It is best to keep the name short and rename it after the library is created.
In the example below, I am naming the library train when I first create it.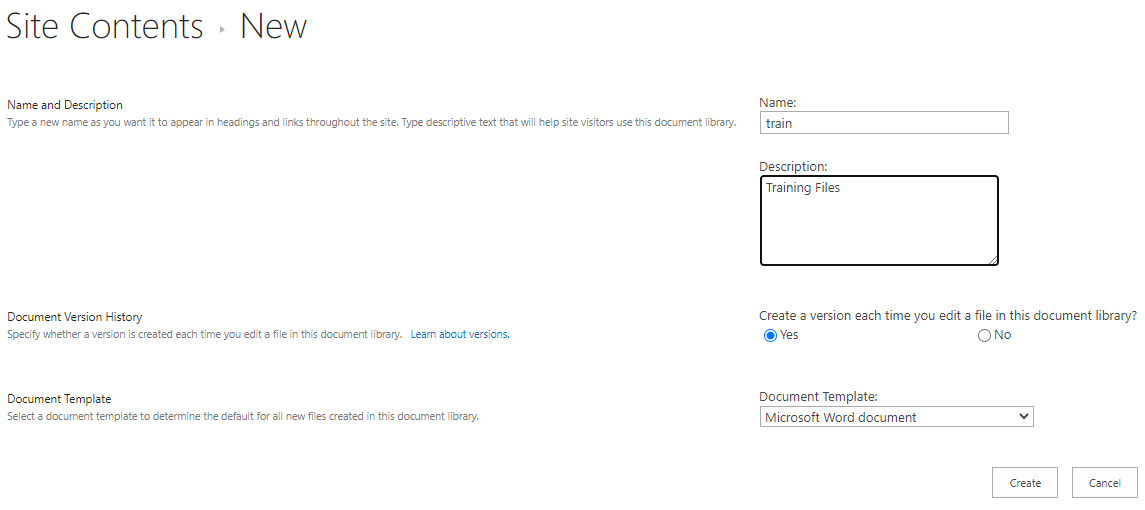
Then I will go to the library settings to rename it to a more descriptive library name.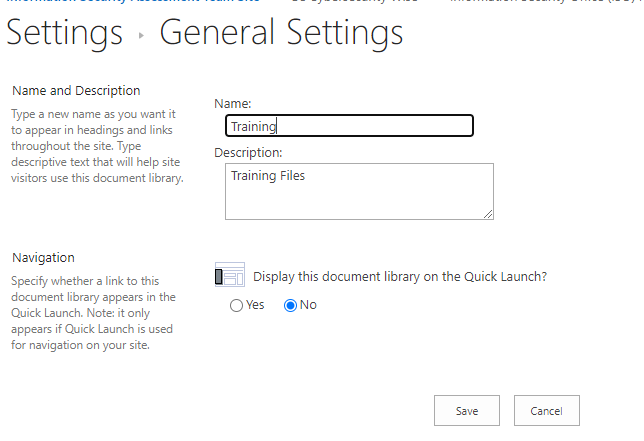
- Follow these steps to Create a library: https://support.microsoft.com/en-us/office/create-a-document-library-in-sharepoint-306728fe-0325-4b28-b60d-f902e1d75939#ID0EACAAA=2013_-_2016
- Follow these steps to Rename a library:
- Navigate to the library you wish to rename from the left QuickLaunch menu or from the View All Site Content option, located beneath the left navigation. Click the library that you wish to rename.
- Click the Library tab.
- Click Library Settings.
- From the “Library Settings” menu, click Title, description and navigation.
- Enter a new Name and Description, click Save.
Step-by-step guide to Create a New SP Group
A new SP group needs to be created which will include the users that need unique permissions to the library.
Things to know before creating a new SP Group.
- The name of the SP group should describe what unique permissions they will have.
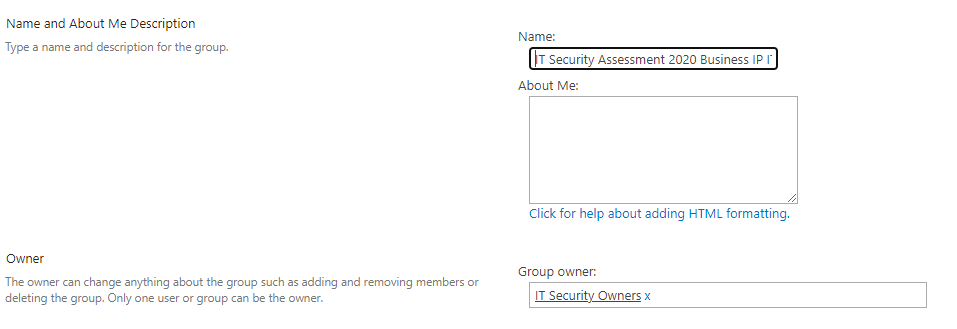
For the example below, this new group will have access to the 2020 IT Security Assessment for Internal Penetration Testing - The group owner will default to your name. Update this with the owner group for the site so that any owners can update permissions for this group.
- The permissions you give the group at this step will be the permissions they have for the whole site.
The main levels to use are Contribute, Read, and Contribute - View Edit Add Only.
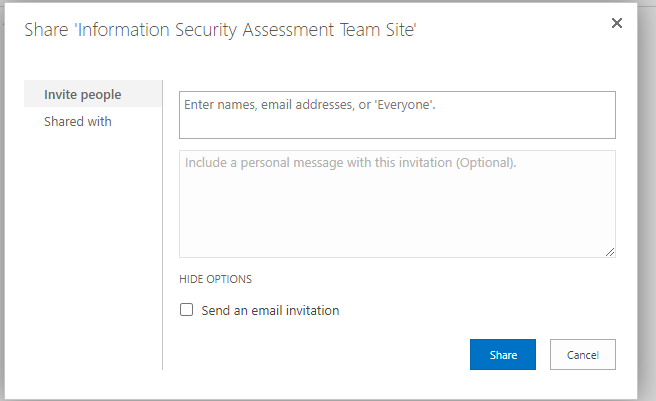
- When adding users to a SP group, the Send an email invitation box is checked by default. Uncheck this box and notify the users they have access once all permission changes are complete.
- Follow these steps to create a group and add users to the group: https://docs.microsoft.com/en-us/sharepoint/customize-sharepoint-site-permissions
Step-by-step guide to Customize Permissions for a Library
Things to know before customizing permissions on a library.
- Enter the new SP group created to give that group access to the library.
- When customizing permissions for the library, users will get an email if the Send an email invitation box is checked. Uncheck this box and notify the users they have access once all permission changes are complete.
- The main permission levels to use are Contribute, Read, and Contribute - View Edit Add Only.
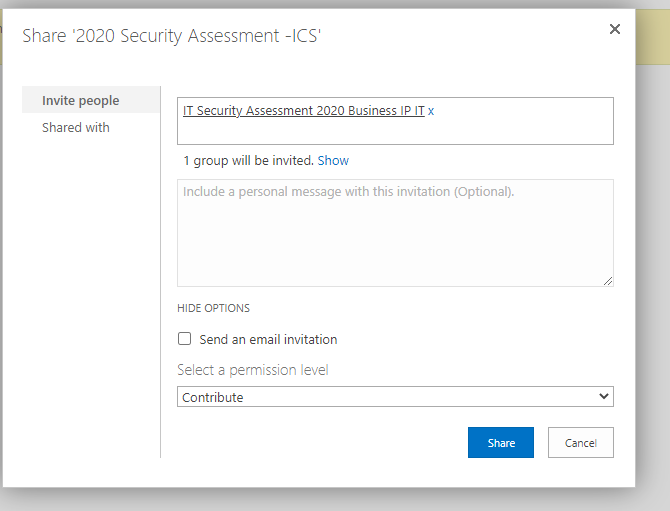
- Follow these steps to customize permissions for a library, https://support.microsoft.com/en-us/office/customize-permissions-for-a-sharepoint-list-or-library-02d770f3-59eb-4910-a608-5f84cc297782
Step-by-step guide to Customize Permissions for a Library
Things to know before customizing permissions on a subfolder:
- These steps are similar to customizing permissions for a library, but they are done at at the folder level.
- Follow these steps to create a folder in a libray: https://support.microsoft.com/en-us/office/create-a-folder-in-a-list-61385c6d-5dec-4d3b-8aa9-16d8356d6bcd
- Follow these steps to change the permissions on a subfolder: https://support.microsoft.com/en-us/office/change-the-permissions-on-a-subfolder-5427bd7c-f20a-4f75-8cf2-5359dd45a1a6
