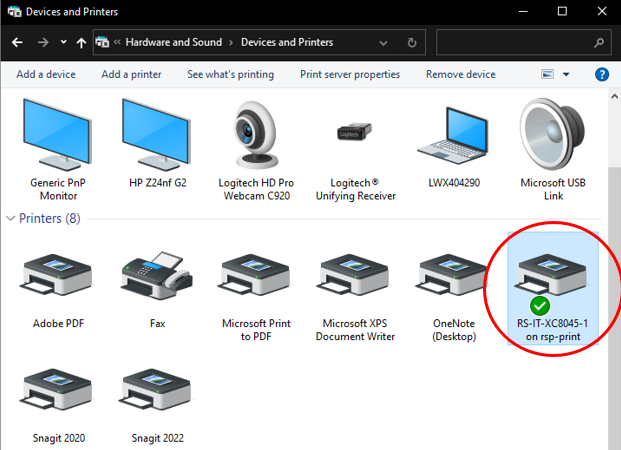
How to Add a Printer/Copier
Steps:
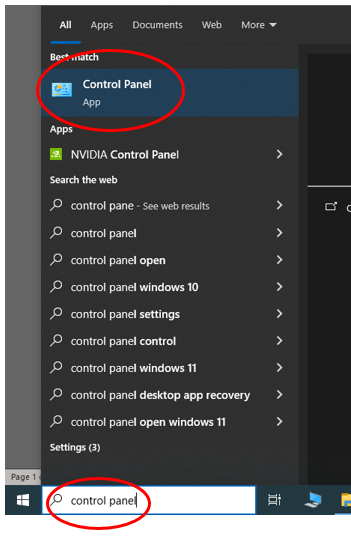
Navigate to and click the Windows Start Menu or the search bar on the bottom left of the screen.

Type, “Control Panel,” then click on Control Panel. See image below.
You’ll see one of the two views below
A. Under “Hardware and Sound,” select, “View devices and printers”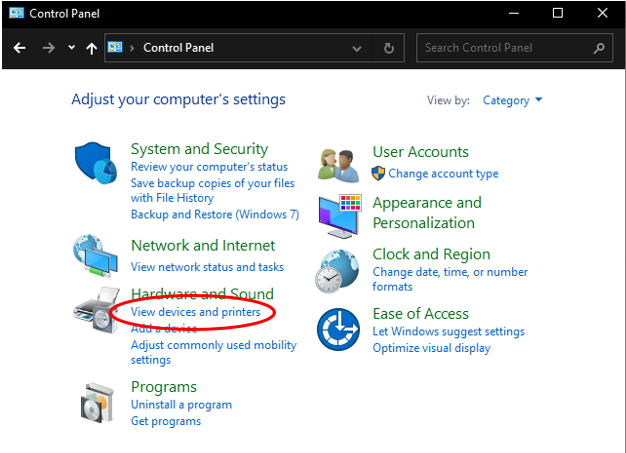
B. Select “Devices and Printers”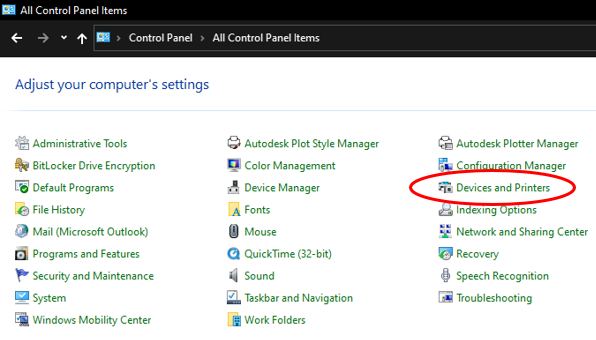
You should get the following screen below. On the top left, click “Add a Printer”

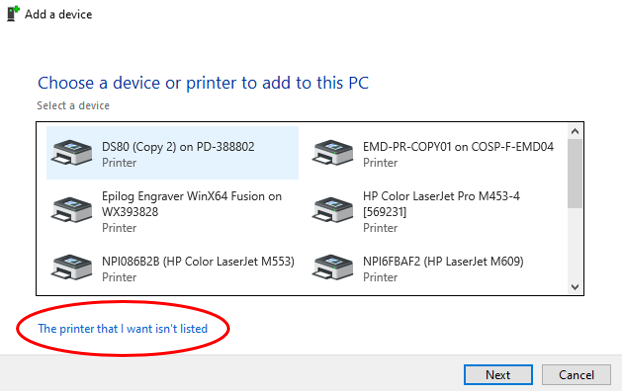
A small window will pop up. Click, “The printer that I want isn’t listed”
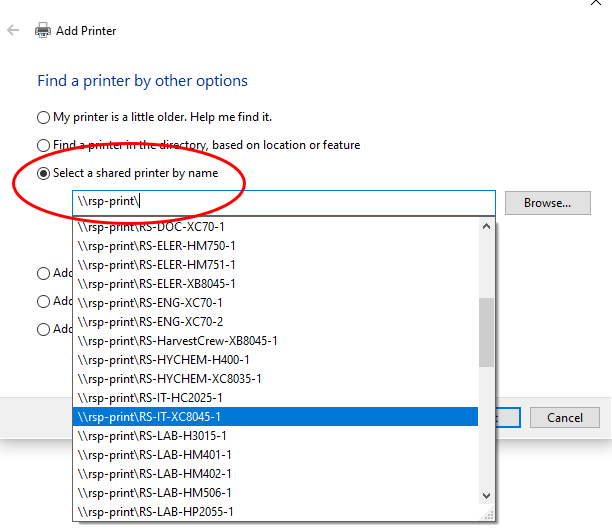
Select “Select a shared printer by name” and type in \\rsp-print\ for EchoWater or \\sdprint\ for NACY and Goethe
The following window will pop up when the printer/copier has been successfully added
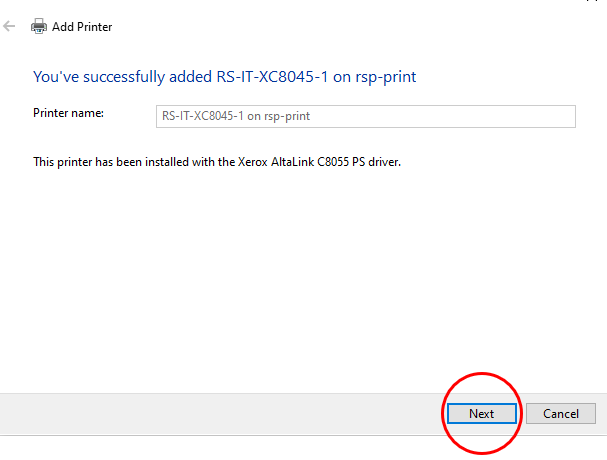
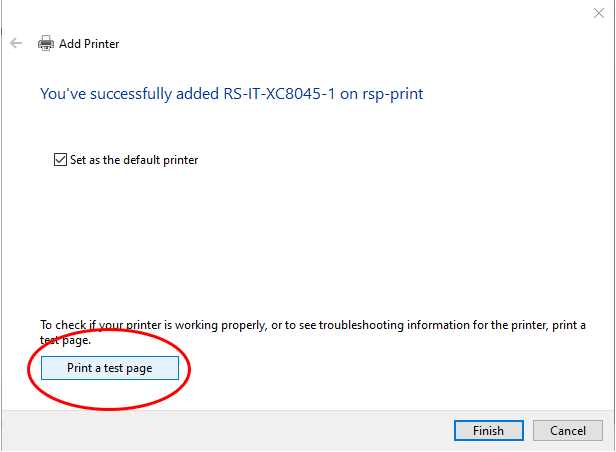
Click “Next”To test if the printer/copier has been successfully added, click on the button, “Print a test page.”
The following window will pop up. Check the printer/copier to see if your printing was successful. If it was successful, click “Close.”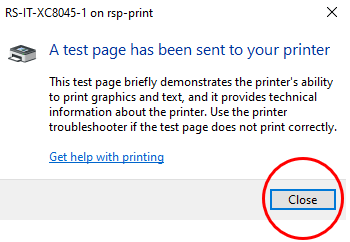
If this will be your default printer/copier, make sure the “Set as the default printer” check box is selected. If not, leave the box unchecked. Click, “Finish”
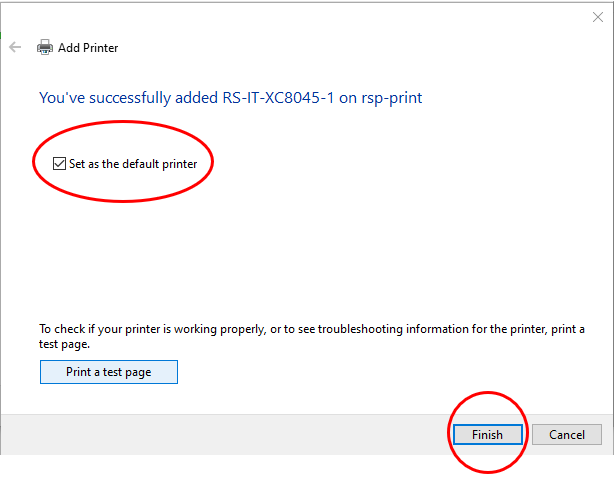
The printer/copier has now been successfully added and will appear as an option for printing
